Version 1.35 – November 2025
- Added note about Da Big Day Table and bioniks
Version 1.34 – October 2025
- Ported the flak armour fix from the Digga faction pack
- Added a box out explaining the difference between Gorkers and Morkers in game terms
- Backported improved vehicle rules from Digga faction pack
- Added fixed weapon clarification from Digga faction pack
- Added rules for removing warriors from the mob
- Clarification of different Strength values for Warriors with arm injuries when using two-handed HtH weapons
- Added a section on how captives are dealt with
- Added list of special characters that can be recruited
- Unified wording with Shaman across this pack and Gorker/Morker Faction Pack.
- Unified searching to refer only to Ceremony of Searching and Scavenging to be finding Tek
- Fixed the ammo roll for the ‘Eavy Shoota (was erroneously 5+)
- Clarified that Steel Horns and De-Lux Kicking Legs’ extra attacks are at user Strength
Version 1.2 - July 2024
- Added note that all Ork Gunz are two-handed.
- Added Six-Shoota clarification
- Fixed Frag stikkbomb blast template size
- Added clarification that Orks are immune to pinning
- Added note that Fixed Weapons and Gubbinz can be swapped around between games
Version 1.1 - January 2022
- Difficult Terrain -> Difficult Ground (and similar)
Version 1.0 - September 2022
- Initial version.
Changes from ORB:
- Vehicles split into Transports/Fire Support/Bikes
- Vehicle cards introduced (slightly tweaked damage tables)
- Boss Skills introduced (Unique to Gorkers/Morkers)
- Kustomisation improvements made better
- Dok’z Serjery has mob rating tweaks separate to costs
- Slight changes to Da Big Day table equivalent (Iz It Safe table)
- Basic bionik legs introduced
- Eyes and headwounds are now treated separately with the Kustom Orculars table
- Digga Shaman skills tweaked to function properly for recruited Diggas
- Digga Scavenging rules introduced
- Spear statline standardised
- Added the explicit ability to fire mob members
- Added -1 to hit at long range for ‘Eavy Shoota
Note: Diggas are recruitable by Orks in Gorkamorka – this is not a GCE change. See see 27 of Digganob for details.
Introduction
This is the Gorker and Morker faction pack for Orks. It’s designed to work in conjunction with the other GCE rulebooks so you’ll want to grab copies of those too.
Changes from the Gorkamorka listings
These rules are not entirely the same as the rules for Gorkers and Morkers written by Games Workshop. They aim to be very similar but with a few tweaks here and there. GCE retains compatibility with the Gorkamorka Mob listings so if you would prefer to use those the good news is that they’re not deprecated or obsolete. Just use those instead!
Basic vs. Advanced Rules
This book is divided into two sections. The first is the basic rules for Gorkers and Morkers - roughly equivalent to the rules presented in Games Workshop’s Gorkamorka: Da Uvver Book.
This book is designed to eventually contain all the rules that can apply to Gorkers and Morkers. Given the volume of content this would make it rather unwieldy for newcomers so we’ve instead decided to silo that content in the advanced section. Players can then choose which advanced rules they’d like to use, or ignore them entirely.
Gorkers and Morkers
Gorkers and Morkers are so named for their faction allegiance. Unlike normal Orks their Klan affiliation is not their primary identity - instead they align themselves to one of the two Ork gods, Gork and Mork.
Why would that be the case, you ask? For that we’re going to have to tell you a story.
Orks are well known for their Waaaghs - their term for a cross between a holy crusade and a pub crawl. A group of the green monstrosities will descend on a planetary system en masse and start causing carnage. Subjugation might be the vaguely defined ultimate goal but taking part is far more important than getting results (as far as the Orks are concerned).
The traditional way of moving large numbers of Orks across the galaxy is by riding on a spacehulk. Ships travelling great distances do so by jumping into the Warp, a strange dimension where the rules of time and space are at best guidelines. Some ships come out the other side, many do not. Lost ships become entangled in each other and form enormous masses of unfathomable scale - spacehulks.
Once a population of Orks has a strong enough leader (who puts a stop to most of the infighting) they tend to want to spread their wings in the form of a Waaagh. A traktor beam will be built and the Orks will pray to their deities to send them a spacehulk. Whether it’s Gork, Mork, or some other strange power that answers their prayers is a question for scholars - the end result is a spacehulk snared by a traktor beam above the planet. Some Ork Mekboyz teleport onboard and setup a breathable atmosphere and then the exodus begins. Once ready for departure the traktor beam is reversed and the hulk punts off into space (and usually into the warp).
It’s probably worth mentioning at this juncture that the idea of a specific destination has yet to enter the narrative. As previously mentioned, it’s the taking part that counts. The spacehulk will usually re-enter the warp and from there float around a bit and eventually emerge back into realspace somewhere ripe for a zoggin’ good conquering.
Usually.
Sometimes things go awry and the Orks emerge in some backwater system and crash land on a planet no one cares about. This has happened plenty of times over the millennia but we’re going to talk about a specific incident – Angelis.
Stranded
This barren rock in the Ultima Segmentum has no claim to fame and could be summed up as a deserted desert. The term “barren” is particularly relevant as it was suspiciously lifeless - down to a microbial level. During M35 the Imperium of Man was investigating it, having flagged it up as emitting strange energies. The investigation was never concluded as a certain spacehulk popped out of the Warp and smashed into the planet, taking the Imperial ship with it.
The hulk gouged an enormous artificial canyon into the planet, thousands of miles long, breaking apart and scattering ancient spaceship debris as it went. At the far end of this canyon remains of the hulk sat and smouldered. Onboard nearly all the Orks had been killed, unsurprisingly. Fortunately Orks are almost amusingly difficult to kill and some survived. The radiation and toxic waste thrown out by the crashing spacehulk were nuisances, certainly, but a little ol’ apocalypse wasn’t going to keep our green friends down.
Ever the optimists the Orks set about rebuilding. They had a Waaagh to be getting back to, after all. They turned to their mechanically-inclined caste, their Mekboyz. These engineer inventors weren’t daunted in the slightest at the prospect of starting over. All these parts and a blank canvas? Bliss!
The other Orks were tasked with bringing them raw materials and setting up all the necessary things for Ork society (e.g. brewhouses, fungus farms, and so on). For all their other virtues Orks aren’t the most imaginative when it comes to naming things and this settlement became known as “Mektown”. I can’t imagine why.
So the Meks set to their task and work progressed. They were going to get the Orks off Angelis and back to the Waaagh. The specifics of how that was going to be accomplished were not as clearly defined, unfortunately. Some were quite obviously building another traktor beam, as was right and proper. Others felt that a propa’ spaceship was the way to go and a Kroozer of some description was under construction. Then there were the more radical Meks that felt some sort of gargant was what was called for, or some sort of Warp gate, or something else again. Whilst there was certainly unity of purpose the direction was somewhat lacking.
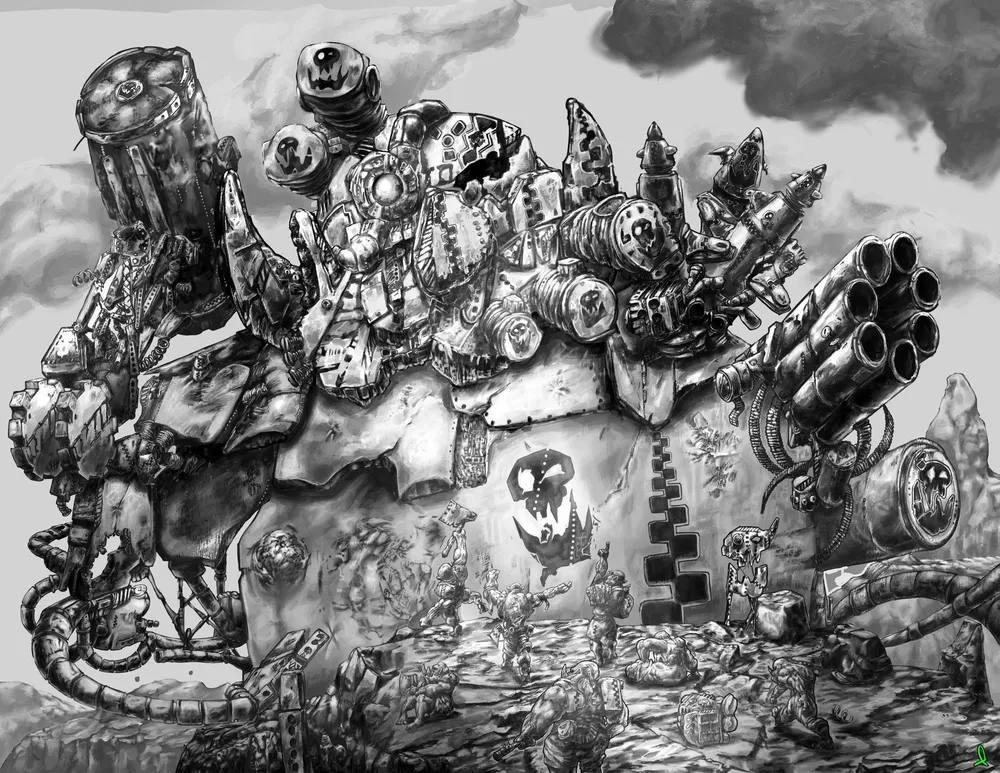
A Difference of Opinion
Whatever the purpose of the ever-growing mass of metal in the centre of Mektown was, it was beginning to resemble a massive idol to Gork. Or possibly Mork. This is fairly common when it comes to large contraptions built by Orks but those aren’t usually vital to the salvation of the Ork population. Seeing their god slowly manifest to deliver them was awe-inspiring for the Orks of Mektown. Given that it was very clearly Gork those fickies who blaspheme and claim it’s Mork need to be “educated” - by force! The enlightened Orks who knew it to obviously be Mork weren’t going to put up with that sort of nonsense, as you can imagine.
These tensions eventually came to a head and things kicked off in spectacular fashion. Punches were thrown, gunz fired, and flammable things caught fire. When the raging fires eventually burned themselves out there wasn’t much left of the great machine.
As enthusiastic as the Mekboyz are, they weren’t best pleased, to put it lightly.
From that day on it was decided that the giant construction would be known as Gorkamorka and the specifics of which god it represented saved for its eventual completion. Any fighting about the subject was to be conducted outside Mektown on pain of, well, pain.
Pax Mekana
In the meantime construction continues and Orks scour the surface of the planet for raw materials, scrap, and interesting technology to sell to the Meks.
How long this state of affairs will last is anybody’s guess. Perhaps a few years, perhaps a few thousand years - it depends on how long the cycle of conflict repeats itself. Ultimately one Ork might gather enough power and influence to unify the greenskin population but for now it’s a bit of a wild west.
That’s the big picture covered but what about the day-to-day stuff? Let’s talk about that next.
Fame and Fortune
Most Orks live for adventure; fighting, riches, and glory. Life in Mektown is otherwise fairly plodding, filled with the various industries needed to supply everything Ork society needs. Whether it’s bullets, clothing, or paint there’ll be some Oddboy caste (Ork specialists) that keeps it flowing into the bazaars and other establishments.
Orks that don’t have the genetic predisposition towards being an Oddboy sometimes get by providing security but mostly they aim to join an Ork Nob’s mob. Larger and braver than your average Ork (which is saying something, really) these lads recruit a group of Orks and venture out into the wastes.
Usually this involves finding a promising area and setting up a fort as the base of operations. The crashed hulk filled the wastes with scrap - much of it below the surface. A fort provides somewhere safe to dig it out, mining it like any other buried resource. It’s also somewhere to sleep, weld vehicles back together, recover from wounds, and plot the next big move.
It’s worth mentioning that a “promising area” isn’t a legal concept. There’s no staking a claim or other such niceties. If another Ork mob wants it, they’ll try to take it!
Might makes right in Ork society and every Nob aspires to be the one who can take whatever territory they set their minds to. Recruiting tough lads who are up to the task and leading them to the top is the goal.
To this end they’ll put the word out in the brewhouses, visit the bazaars, and talk to whoever will listen. Maybe that Sumboy has a yoof that can’t figure out which way up the abacus goes, or the Mek across the street has an apprentice looking to get out and about - that sort of thing.
Gorkamorka Worlds
Many will be familiar with the tale of Angelis. Orks have space hulk. Orks crash Space Hulk. Orks build society on destroyed planet. Orks scavenge for scrap for the Mekboyz. Mekboyz build giant technological effigy to Mork/Gork to get them rescued. Orks disagree whether it’s Mork or Gork. Civil war ensues. It’s a tale as old as time.
Angelis is a desolate and harsh environment. At least it is now, after the Orks ploughed into it. It should come as no surprise that all their scavenging is to provide scrap to the mekboyz so they can build their Gorkamorka. It is such a massive feat of greenskin engineering that nobody is quite sure how it will work. Perhaps a beacon or rocketship? Maybe a tellyporta? Who knows? The meks certainly don’t.
Angelis however is not the only planet where this has happened. Orks, if you would believe it, crash space hulks all the time. The range of planets they crash into vary significantly, from desert wastelands to ice moons, from ocean worlds to lava pits. I for one am curious that Orks tend to Crash into planets where one geographic typography is dominant. Although it’s not hard to imagine the curious flyboyz trying to take a closer look.
Orks have a very primal drive so it should come as no surprise to you that once faced with similar crashed space hulk scenarios that they behave in the same way.
I’m unsure if this predictable behaviour is their primal survival instinct or just in the space hulk’s inflight magazine and safety manual. In either case, the combination of the specific events and mechanical effigy is known as Gorkamorka, thus if we see Orks in that situation on a planet, the planet is known as a Gorkamorka world.
-Depiff, abridged
Creating a Mob
Gorkers and Morkers are very similar so for brevity we’ll just be referring to them as Ork mobs for the purposes of this document. These rules only apply to Gorkers and Morkers though - not any given Ork mob, it’s just to keep the wording a bit simpler!
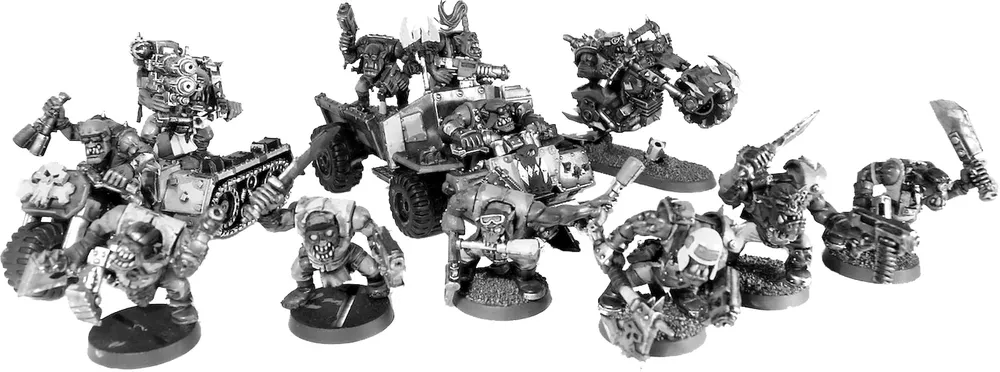
When recruiting your Ork Mob there are a number of warrior types available. We’re going to go through them below before tackling the nitty gritty of hiring, statlines, and so on.
Nobs
Bigger, burlier, and with more vision than most Orks. He’s looking to make a name for himself and is willing to go to great lengths to make it happen. Every Ork Mob is led by an Ork Nob.
Spanners
With a natural aptitude for the mechanical, these lads are part of the Mob to get the experience and knowledge needed to become a full blown Mek, one day they may even get to work on the Da Big Projekt in the centre of Mektown. They’ll patch up vehicles, maintain weapons, and keep the mine’s equipment chugging along.
Slaverz
Grots are lazy little gits and for all their enthusiasm at getting to be part of a real Ork Mob most Orks don’t have the patience to deal with them. That’s where Slaverz come in. These professional Runtherderz are cunning and stoic enough to keep weedy Grots alive and doing what they are told. You’ll also need a Slaver to put captives to work in your scrap mine (See Income section for details) and speaking of captives, Slavers have access to unique weapons that will make acquiring some just a little bit easier.
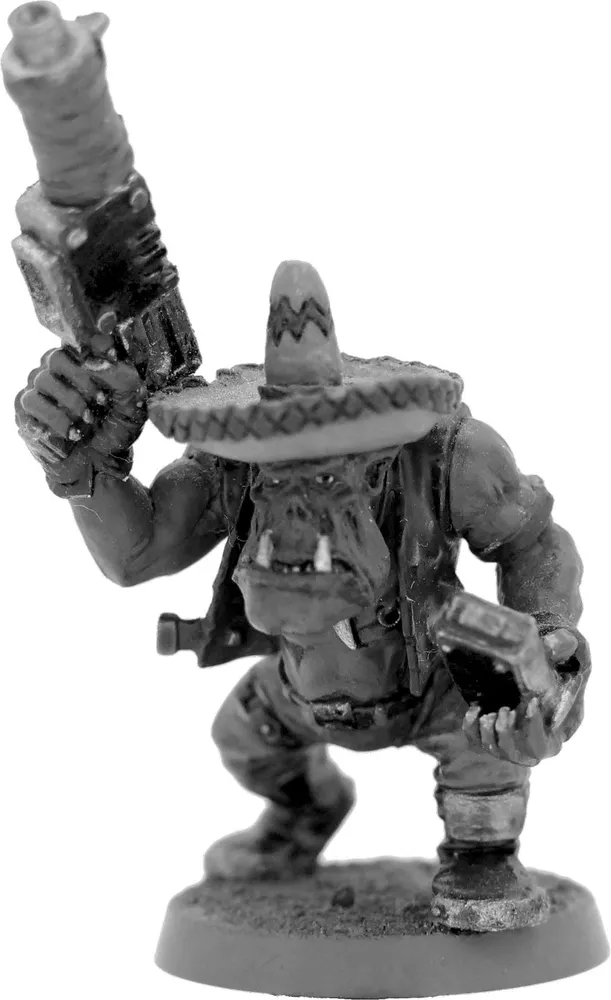
Boyz
Burly Orks with a bit of fighting experience. These lads form the core of the mob’s fighting force and also provide the main workforce for the mob’s scrap mine.

Yoofs
Fresh-faced Orks who’ve only recently emerged from their subterranean cocoons. They’ve got spirit but lack the experience to be much use in a fight yet. A few battles will soon see them joining the ranks of the Ork Boyz though!
Grots
Another branch of the Ork ecosystem - Grots are weedy little creatures and can certainly never measure up to an Ork. They’re a fairly solid match for your average human despite their lack of height but they scare easily!
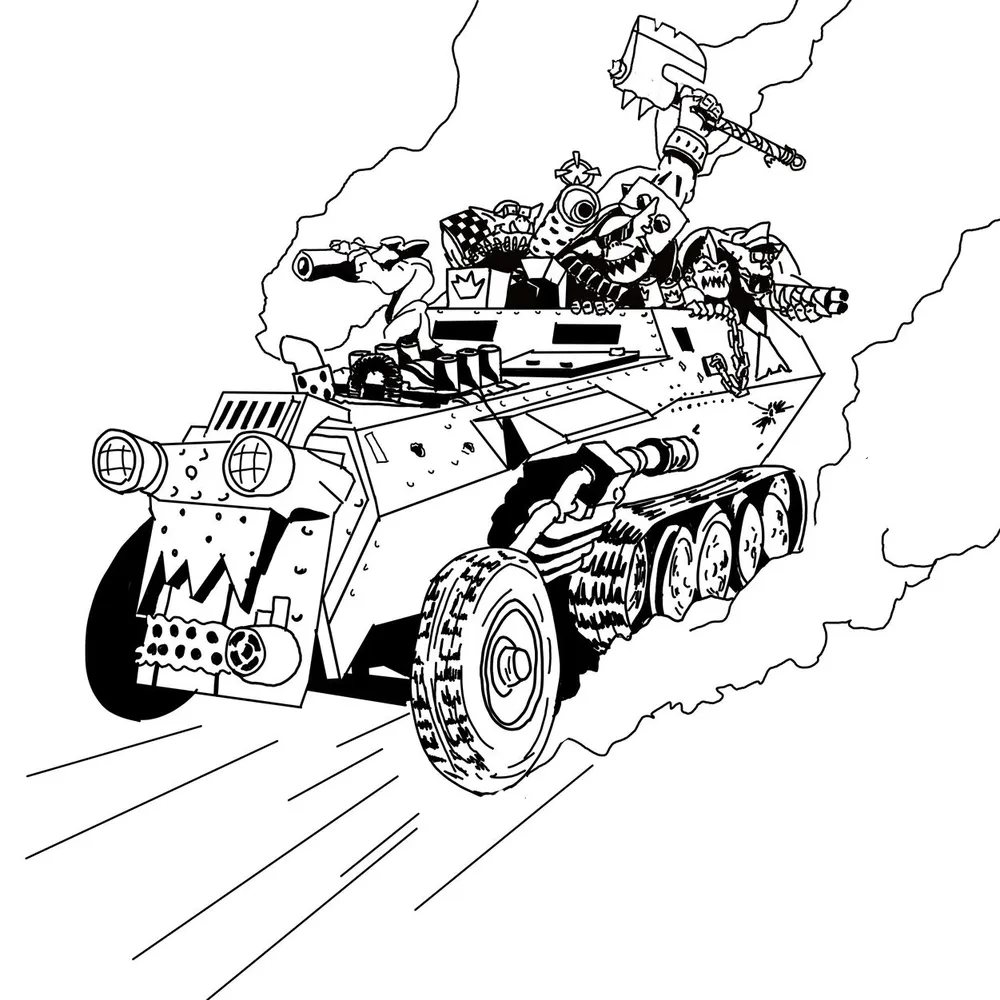
Vehicles
Ork mobs use a variety of vehicles. Their vehicles fall into two size categories - big and small. Small vehicles are generally warbikes and don’t have roles to concern themselves with. Big vehicles come in two flavours: Transports and Support.
Their roles and the way they’re propelled are separate so we’ll talk about tracks vs. wheels in the next section.
Transports
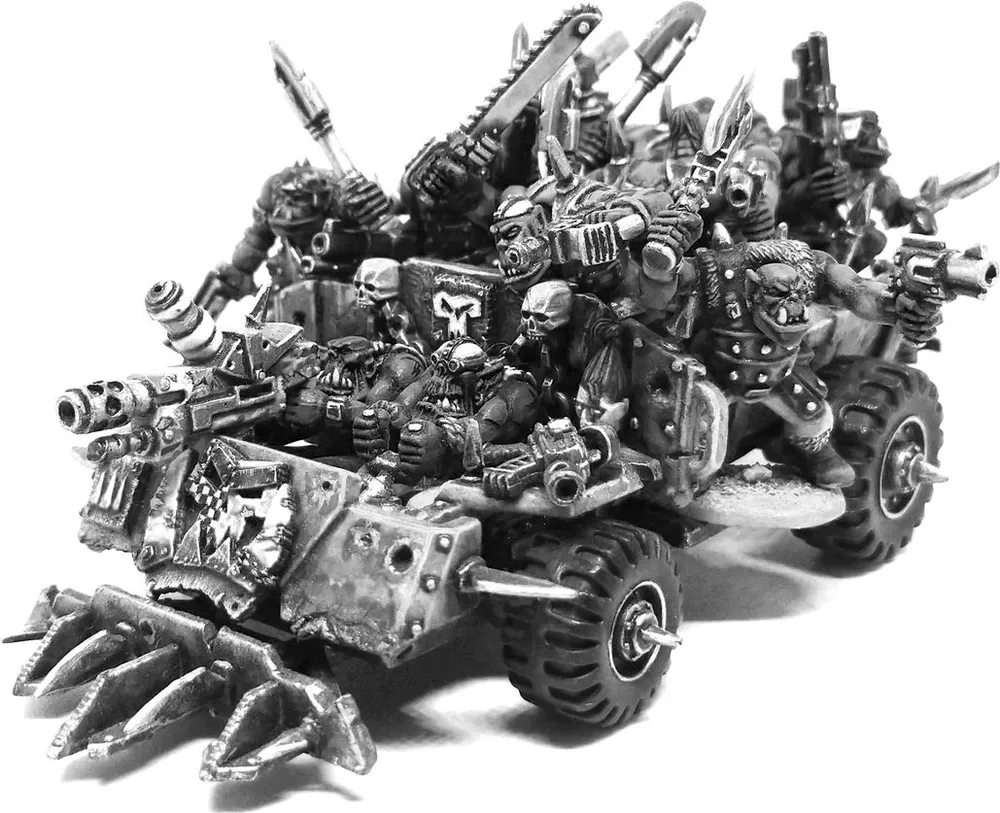
Usually these take the form of Trukks or Traks and are identified by their capacity for passengers (Crew in game terms). They can mount Big Gunz but their primary purpose is to move Orks and materiel around the place. In game they should be modelled to physically accommodate the Models of the mob. Whilst a huge vehicle might sound like a good idea in theory you’ll find that they’re a lot harder to steer around obstacles - and template weapons affect them much more.
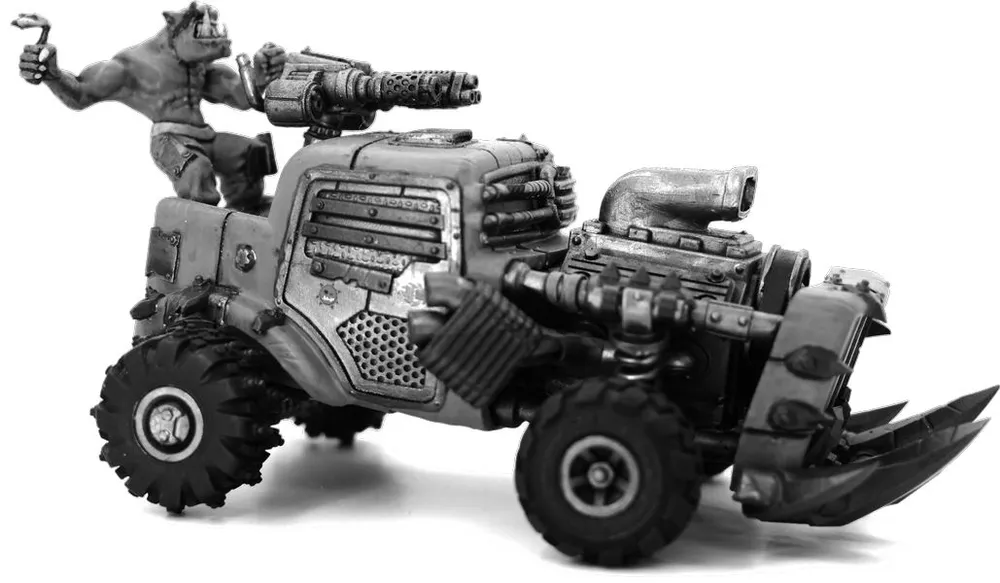
Support
These vehicles are basically mobile weapons platforms. They’re smaller and don’t have dedicated transport space, so only the driver benefits from the vehicle’s armour - any other crew or passengers have to take their chances! They can be used to pick up cargo and carry as many passengers as they can fit, but probably shouldn’t! If you find yourself adding platforms and room for many passengers then remember how vulnerable they'll be - consider making it a transport instead.
Small Vehicles (Bikes)
These vehicles are light and fast - usually bikes but other contraptions are available. They have no protection for any additional crew and have very limited options for mounted weapons. They can be used to outflank the enemy and snatch valuable loot from around the battlefield.
Traks vs. Wheels
When adding any Vehicle to your Mob you’ll need to consider whether you want your vehicle to use Traks or wheels. A Model with Traks is slightly slower but handles rough terrain better. Wheeled vehicles are the other way around - they’re faster but struggle with difficult terrain.
Recruiting Your Mob
When recruiting your Mob there are specific requirements and limitations on the structure of your mob. First the requirements:
- Your Mob requires 1 Ork Nob - your leader.
- You must have at least 3 warriors, including your Nob.
- You need enough vehicles to transport your entire mob.
- You must have one Spanner per large vehicle (or one for every three small vehicles).
- You must choose an affiliation! Are your warriors Gorkers or Morkers?
There are then some options:
-
You may include Ork Yoofs. The Ork Yoofs may not outnumber the other Orks in your Mob (e.g. 1 Nob, 1 Spanner, 6 Boyz, and 8 Yoofs would be valid - but not 9)
-
You may take one or more Slaverz. If so you may recruit Grots. The Grots must not outnumber the Orks, including Yoofs (e.g. 1 Nob, 1 Spanner, 1 Slaver, 2 Boyz, 5 Yoofs, and 10 Grots!)
Gorkers and Morkers
In game terms Gorkers and Morkers vary only slightly. The primary implication of this decision is the skills available to your Warriors as they advance. Other than that it can affect things like who Warriors Hate when affected by the Bitter Enmity Serious Injury result. Depending on your campaign, it might come up in other ways, but in terms of the main rules, that’s about it - definitely worth starting a civil war over!
Each vehicle must also have an assigned Driver and Gunner (where applicable). This assignment cannot be changed without engaging in a Bar Brawl (detailed later in these rules). Drivers and Gunners do not have to be Orks - the roles are normally held by Orks but if your mob is a bit weird that’s okay. If the vehicle has a Fixed Weapon it must be mounted facing one of the four quadrants (front, back or sides) It is fixed in place during battles but may be re-mounted to face a different quadrant during the pre- or post-battle sequence.
Statlines and Costs
Nob - 12 teef
| M |
WS |
BS |
S |
T |
W |
I |
A |
Ld |
|---|---|---|---|---|---|---|---|---|
| 4 |
4 |
4 |
3 |
4 |
1 |
4 |
1 |
7 (8) |
Leadership: Whilst he’s nominally in charge of the Mob he doesn’t properly receive Nob status until he’s won a battle! Once he wins a battle he will automatically gain 1 point of Leadership (but may never exceed the stat cap of 9). Until this happens the Mob may not buy Kustom Jobs. The meks will still repair their vehicles.
Immune to Pinning: Pinning rules do not apply to Ork Nobz.
Equipment: Hand-to-Hand, Gunz, Stikkbombz, and Armour
Spannerz - 6 teef
| M |
WS |
BS |
S |
T |
W |
I |
A |
Ld |
|---|---|---|---|---|---|---|---|---|
| 4 |
3 |
3 |
3 |
4 |
1 |
2 |
1 |
7 |
Vehicle maintenance: Your Mob requires one Spanner per large vehicle. One Spanner can alternatively maintain up to three Warbikes.
Immune to Pinning: Pinning rules do not apply to Ork Spannerz.
Equipment: Hand-to-Hand, Gunz, Stikkbombz, and Armour

Slaverz - 6 teef
| M |
WS |
BS |
S |
T |
W |
I |
A |
Ld |
|---|---|---|---|---|---|---|---|---|
| 4 |
3 |
3 |
3 |
4 |
1 |
2 |
1 |
7 |
Runtherdin’: If you want to hire Grots or Diggas your Mob must include a Slaver. Additionally a Mob with a Slaver can put captives to work in the mob’s mine for extra income.
Immune to Pinning: Pinning rules do not apply to Ork Slaverz.
Equipment: Hand-to-Hand, Gunz, Stikkbombz, Armour, and Slaverz Stuff.
Boyz - 5 teef
| M |
WS |
BS |
S |
T |
W |
I |
A |
Ld |
|---|---|---|---|---|---|---|---|---|
| 4 |
3 |
3 |
3 |
4 |
1 |
2 |
1 |
7 |
Immune to Pinning: Pinning rules do not apply to Ork Boyz.
Equipment: Hand-to-Hand, Gunz, Stikkbombz, and Armour
Yoofs - 3 teef
| M |
WS |
BS |
S |
T |
W |
I |
A |
Ld |
|---|---|---|---|---|---|---|---|---|
| 4 |
2 |
2 |
3 |
3 (4) |
1 |
2 |
1 |
7 |
Toughness: Yoofs start out a bit squishy but soon toughen up. Once they gain enough experience to become Boyz (21 experience points) they automatically gain 1 point of Toughness (in addition to any other advances). You do not need to update their cost when this happens.
Immune to Pinning: Pinning rules do not apply to Ork Yoofs.
Equipment: Hand-to-Hand, Gunz, Stikkbombz, and Armour
Grots - 2 teef
| M |
WS |
BS |
S |
T |
W |
I |
A |
Ld |
|---|---|---|---|---|---|---|---|---|
| 4 |
2 |
3 |
3 |
3 |
1 |
2 |
1 |
5 |
Pinning: Grots are subject to Pinning.
Equipment: Hand-to-Hand and Gunz

Equipment
The full rules for weapons and equipment can be found in the appendix of this pack.
Hand-to-Hand
- Knife - free
- Chain - 1 toof
- Club or Choppa - 1 toof
- Spear - 1 toof
- Slugga - 2 teef
- Six-Shoota - 2 teef
- ‘Uge Club or ‘Uge Choppa - 2 teef
Gunz
- Blunderbuss - 1 toof
- Bow - 1 toof
- Crossbow - 1 toof
- Shoota - 2 teef
- Kannon - 3 teef
Stikkbombz
- Frag - 3 teef
- Krak - 5 teef
Armour
- Shield - 1 toof
- Studded armour - 1 toof
- Flak armour - 2 teef
- ‘Eavy armour - 7 teef
Slaverz Stuff
- Bolas - 1 toof
- Grabba stik - 2 teef
- Net - 2 teef
- Whip - 2 teef
Vehicles
Lots of different Ork vehicles exist, but they can mostly be classified as follows:
| Cost |
Armament |
Vehicle Size |
Notes |
|
|---|---|---|---|---|
| Transport |
20 teef |
1 Big Gun |
Big |
|
| Support |
15 teef |
1 Big Gun |
Big |
Armour value 0 for Crew |
| Small (Bikes) |
10 teef |
1 Linked Gun |
Small |
Armour value 0 for Crew, one free Thrust |
Transports have armour for the crew - the other vehicle types do not. Crew capacities are based on how many warriors will physically fit on your model so it’s entirely at players’ discretion. A single massive vehicle might sound like a good idea but you’ll quickly become intimately familiar with the expression “all your eggs in one basket”!
If the traditional WYSIWYG approach to vehicle capacities doesn’t sit well with you see the appendix - there’s some specific numbers you can use based on common sizing.
As with Support Vehicles, Small Vehicles have no armour for their crew. They are faster than their bigger brethren though:
One Free Thrust
Each time a Small Vehicle is eligible to Thrust it does not have to roll on the Thrust Table for the first attempted Thrust - it automatically passes. Subsequent Thrusts must be rolled for as usual, starting from 2+. This is shown on the Small Vehicle Datacard.
Traks Or Wheels
When adding a Vehicle to your Mob, decide whether it has Traks or Wheels. This cannot be changed later. The difference between the two is essentially speed vs. versatility. Tracked vehicles are slower but can traverse terrain better whereas wheels are only good on solid ground.
Wheeled Vehicles have a thrust value of 6”, Tracked Vehicles only have 5”. Vehicles can usually Thrust multiple times each turn so this can make a significant difference!
Traks treat Difficult Ground as normal but can get bogged down just as easily as wheels when encountering Very Difficult Ground:
| Traks |
|
|---|---|
| Terrain Type |
Movement |
| Open Ground |
Normal |
| Difficult Ground |
Normal |
| Very Difficult Ground |
Immobilised |
| Impassable Ground |
Crash/Collide |
Wheels are also not as good on difficult terrain, as you might have seen in the Core Rules:
| Wheels |
|
|---|---|
| Terrain Type |
Movement |
| Open Ground |
Normal |
| Difficult Ground |
Slow Speed Manoeuvres Only |
| Very Difficult Ground |
Immobilised |
| Impassable Ground |
Crash/Collide |
When you’re filling in your Mob roster you’ll need to add the relevant terrain handling characteristics to the vehicle's datacard.
Fixed Weapons
The vehicle table above lists the different types of Vehicles and their options for armaments. These are optional - you aren’t required to buy or field a Fixed Weapon for your Vehicles. You can also choose to buy one later, when you have the spare cash.
Fixed Weapons are either two Gunz linked together (see the Armoury Appendix for details), or an item from the Big Gunz list below. A Vehicle that can fit a Big Gun can instead fit a Linked Gun, if you so choose (lots of mobs start out with a Linked Gun on their big vehicle and then later upgrade to a propa’ Big Gun).
Fixed Weapons can also be swapped between Vehicles between games, should you so choose (within the restrictions shown in the table).
Big Gunz
- Harpoon gun - 7 teef
- Skorcha - 8 teef
- Spear gun - 9 teef
- Rokkit launcher - 13 teef
- ‘Eavy Shoota - 15 teef
Linked Gunz
If your vehicle can’t mount a Big Gun, or you don’t want to spend that much, you can opt for a Linked Gun. Pick one of the Gunz from the Gunz list (e.g. Shoota) and pay for two of them. The Linked Gun’s profile will be that of the Gun with the additional bonus of 1 Sustained Fire Dice (SFD). The two Gunz can not be separated - they’re now one weapon for all intents and purposes. Just like a Big Gun they cannot be wielded by a Warrior on foot.
Gubbinz
Ork vehicles can be fitted with a variety of Gubbinz. These can be fitted between games (after your first game). Just pay the relevant cost and the vehicle’s Spannerboy will fit them.
Small Vehicles cannot mount as many Gubbinz as Big Vehicles. The limits for different vehicle types are described in the rules for each bit of Gubbinz. They can also be swapped between Vehicles between games (the aforementioned restrictions still apply).
- Boarding plank - 3 teef
- Extra armour plates - 4 teef each
- Big grabber - 5 teef
- Reinforced ram - 5 teef
- Spikes - 5 teef
- Extra spikes - 10 teef
- Wrecker ball - 10 teef
- Loadsa Ammo - ¼ Weapon Cost (Rounding Up)
Special Rules
Each faction has their own special rules – for Gorkers and Morkers that’s mostly related to their vehicles.
Vehicles
GCE Vehicle Datacards
Gorkers and Morkers have two vehicle datacards to choose from - big and small. The majority of their vehicles are big (Trukks, traks, buggies, and so on) but they also have small vehicles, such as warbikes. The two card types are slightly different so make sure you use the correct one!
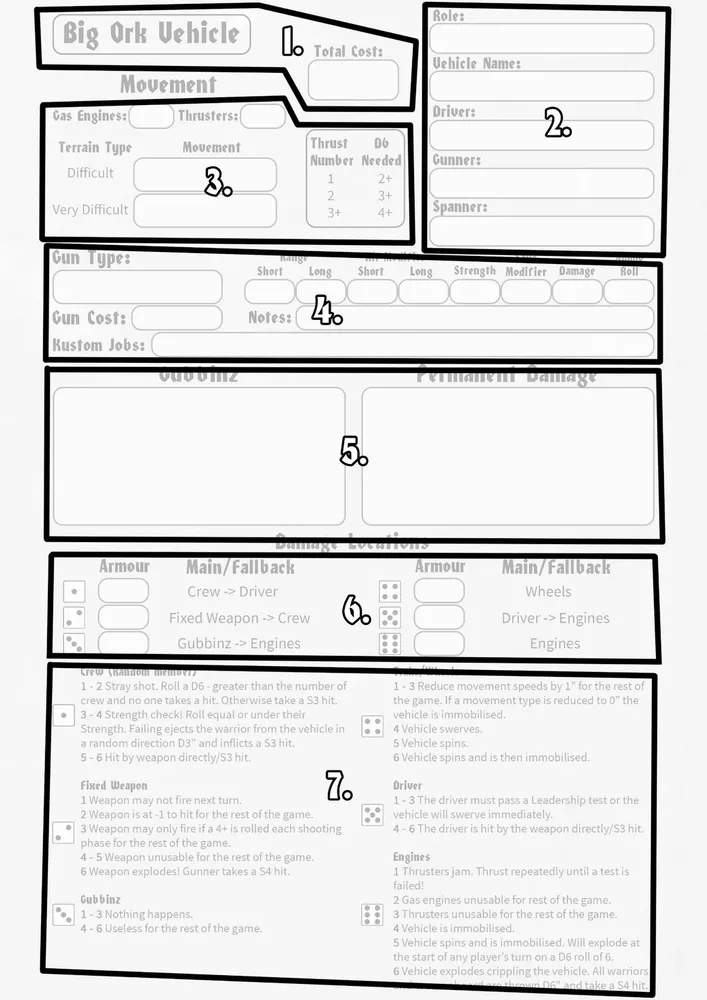
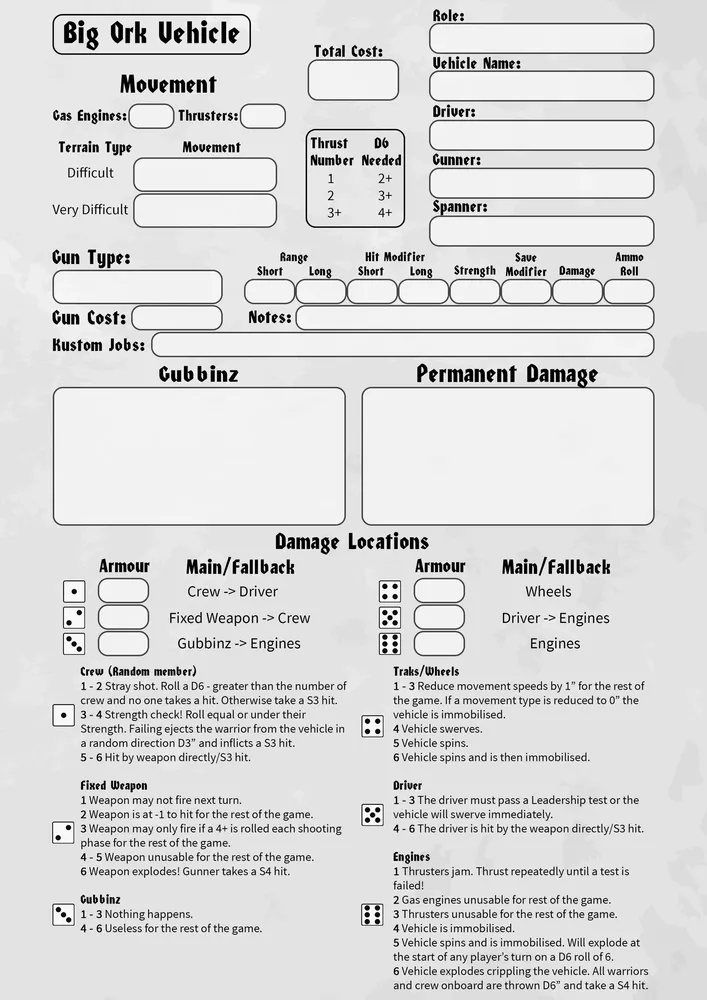
The cards can look a bit daunting to start with but you’ll soon get used to them. They contain all the information specific to your vehicle that you should ever need. We’ll cover filling it in momentarily but first let’s have a quick tour of the Big Ork Vehicle datacard.
Starting from the top we have the role and card type (1). The card type is “Big Ork Vehicle” and there’s also a big box for the total cost of the vehicle.
To the right there’s the vehicle’s role (transport/support, see previous section), name, and crew, including which Spanner Boy is assigned to maintain it (2). To the left there’s the Movement rules (3).
After that there’s the Fixed Weapon profile (4), including any Kustomisations you’ve had done on it.
Beneath that there’s room for details of Gubbinz that have been fitted and Permanent Damage the vehicle has suffered (5).
Finally there’s the Damage Locations with blank boxes for Armour Values (6), including details for which location will be affected if the original one isn’t applicable (e.g. if the driver has been thrown overboard!).
Lastly we have the damage tables (7). When the armour is pierced (e.g. by a successful ram) these are the tables you should roll on.
Filling Out a Vehicle Datacard
To fill one of these in you’ll need to apply the decisions you made earlier. Pick whether you’re dealing with a Small Vehicle (bikes) or a Big Vehicle and grab the relevant card.
For a Big Vehicle fill in the role (Transport or Support), nominate a Driver, Gunner, and Spanner. For a small vehicle there’s no role of Gunner to worry about. You might notice that there is no location in the table for “Gunner” - that’s because Gunners are part of the Crew location. Only Drivers get their own location.
From there pick whether the Vehicle has wheels or traks and fill in the Movement section (see the previous section for relevant movement and terrain values).
Next if your vehicle has a Fixed Weapon fill in its characteristics (see the Armoury appendix of this pack for the details).
Lastly you’ll need the Armour Values. Transports have armour for the Crew location:
| Ork Transport |
|||
|---|---|---|---|
| Armour Value |
Location |
Armour Value |
Location |
| 8 |
Crew |
8 |
Wheels/Traks |
| 8 |
Fixed Weapon |
8 |
Driver |
| 8 |
Gubbinz |
10 |
Engine |
The same is not true for Support vehicles:
| Ork Support |
|||
|---|---|---|---|
| Armour Value |
Location |
Armour Value |
Location |
| 0 |
Crew |
8 |
Wheels/Traks |
| 8 |
Fixed Weapon |
8 |
Driver |
| 8 |
Gubbinz |
10 |
Engine |
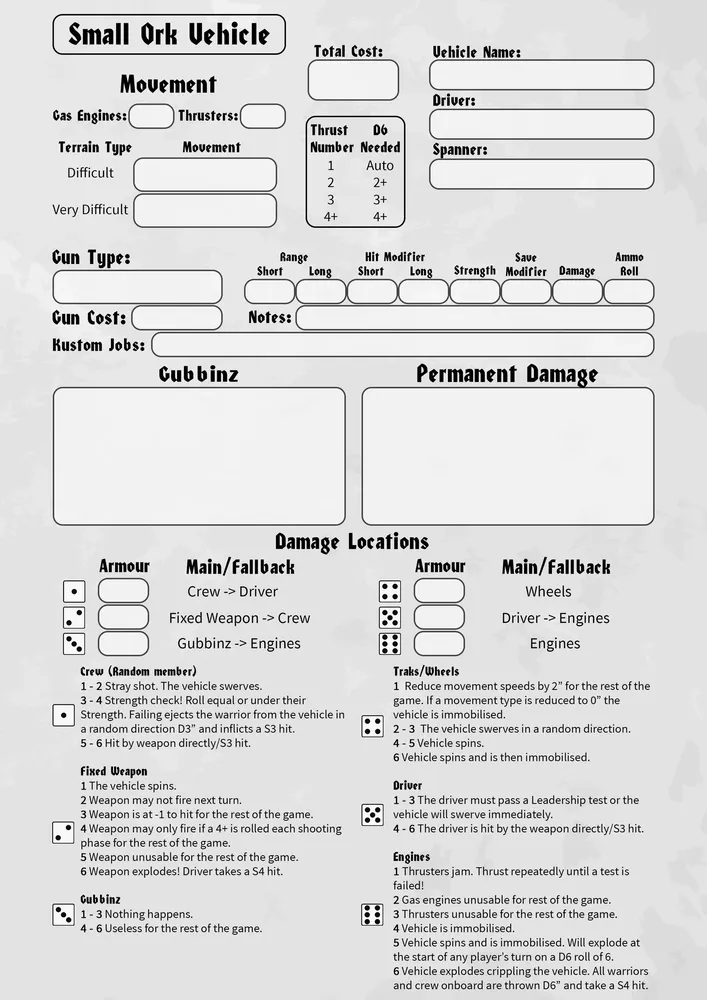
Small vehicles are pretty tough too - but notice that there’s no Armour for the crew.
| Small Ork Vehicle |
|||
|---|---|---|---|
| Armour Value |
Location |
Armour Value |
Location |
| 0 |
Crew |
8 |
Wheels/Traks |
| 8 |
Fixed Weapon |
8 |
Driver |
| 8 |
Gubbinz |
10 |
Engine |
Their damage tables are slightly different too, as well as them automatically passing their first Thrust each turn, as previously mentioned.
Bikes
We’ve decided to create the Small Ork Vehicle designation to be a bit flexible on what that is - mainly to encourage creativity. The category is primarily designed for Ork Warbikes but there’s plenty of other fun oddities cooked up by the Meks
Big vehicle datacard
Small vehicle datacard
Experience and Skills
This section deals only with the additional information needed for Gorker/Morker mobs. For a full explanation of how warrior advances and experience work see the Experience section of the GCE Campaign Book.
Starting Experience
Gorker and Morker Mob members start with the following amount of experience points:
| Type of Warrior |
Starting Experience Points |
|---|---|
| Yoofs |
0 |
| Grots |
20 + D6 |
| Boyz |
20 + D6 |
| Slaverz |
20 + D6 |
| Spannerz |
60 + D6 |
| Nob |
60 + D6 |
Experience Table
Gorker/Morker mobs gain advances at the following thresholds:
| Exp. Points |
Title |
Notes |
|---|---|---|
| 0-5 |
Grub-Yoof |
Yoofs start at this level. |
| 6-10 |
Yoof |
|
| 11-20 |
Yoof |
|
| 21-30 |
Boy |
Boyz, Slaverz,and Grots start at this level. |
| 31-40 |
Boy |
|
| 41-50 |
Boy |
|
| 51-60 |
Boy |
|
| 61-80 |
Skarboy |
Nobz and Spannerz start at this level. |
| 81-100 |
Skarboy |
|
| 101-120 |
Skarboy |
|
| 121-140 |
Skarboy |
|
| 141-160 |
Skarboy |
|
| 161-180 |
Skarboy |
|
| 181-200 |
Skarboy |
|
| 201-240 |
Boss |
|
| 241-280 |
Boss |
|
| 281-320 |
Boss |
|
| 321-360 |
Boss |
|
| 361-400 |
Boss |
|
| 401+ |
Big Boss |
No further advance rolls happen after this point. |
Maximum Statistics values
As described in the GCE Campaign Book here are the characteristics caps for the various types of warrior in Gorker/Morker mobs:
| M |
WS |
BS |
S |
T |
W |
I |
A |
Ld |
|
|---|---|---|---|---|---|---|---|---|---|
| Orks |
4 |
6 |
6 |
4 |
5 |
3 |
5 |
3 |
9 |
| Grots |
4 |
3 |
4 |
3 |
3 |
1 |
3 |
1 |
6 |
If your warrior rolls a characteristic increase that would take them above the cap for that stat then increase the other characteristic in that bracket instead. If both are at their cap then pick any other characteristic that hasn’t reached the cap yet and increase it by one instead. If every stat is maxed out then generate a skill advance from a relevant table (equivalent to a result of 3-4 or 10-11 on the Advance Table).
Skill Availability
When rolling a Know Wots advance Gorkers have the following skills available to them:
| Gorkers |
||||||
|---|---|---|---|---|---|---|
| Muscle |
Ferocity |
Driving |
Cunnin’ |
Dakka |
Odd |
|
| Nob |
✔ |
✔ |
✔ |
✔ |
✔ |
✘ |
| Boyz |
✔ |
✔ |
✘ |
✘ |
✔ |
✘ |
| Spannerz |
✔ |
✘ |
✔ |
✘ |
✔ |
✔ |
| Slaverz |
✔ |
✔ |
✘ |
✔ |
✔ |
✘ |
| Yoofs |
✔ |
✔ |
✘ |
✘ |
✘ |
✘ |
| Grots |
✘ |
✘ |
✘ |
✔ |
✘ |
✘ |
…and Morkers have these:
| Morkers |
||||||
|---|---|---|---|---|---|---|
| Muscle |
Ferocity |
Driving |
Cunnin’ |
Dakka |
Odd |
|
| Nob |
✔ |
✘ |
✔ |
✔ |
✔ |
✔ |
| Boyz |
✘ |
✔ |
✔ |
✔ |
✘ |
✘ |
| Spannerz |
✘ |
✘ |
✔ |
✔ |
✔ |
✔ |
| Slaverz |
✔ |
✔ |
✔ |
✔ |
✘ |
✘ |
| Yoofs |
✘ |
✘ |
✔ |
✔ |
✘ |
✘ |
| Grots |
✘ |
✘ |
✘ |
✔ |
✘ |
✘ |

In addition to the Six skill tables mentioned above, Nobs from either faction may choose to roll on the Boss Skills table:
| Boss Skills |
|
|---|---|
| D6 |
Skill |
| 1 |
‘Ow Much?! The Mob may reroll the Da Bad Nooz section at the Meks or Doks. The second result stands, even if it’s more than the first! |
| 2 |
'Oo Said Dat? Any time the Nob is challenged for leadership of the mob, he may take a leadership test. If successful, the challenging warrior is shouted down and may not challenge for leadership until he gains another Leadership advance. |
| 3 |
We’z Orks! As long as the mob’s leader is on the battlefield and not Down, failed Bottle Tests may be rerolled once per turn. |
| 4 |
Yer Cowardly Grot A Nob with this skill may issue a challenge to any enemy warrior once per battle in addition to any challenges allowed by scenarios. This challenge may not be declined by the opposing warrior. Both Models may only shoot at each other or the vehicles they are in until they meet in Close Combat. They may move and fight in Hand-To-Hand Combat with other warriors as normal, when the two warriors meet in Close Combat the challenge ends. |
| 5 |
Break it up!
The Nob can choose to break up a Bar Brawl before rolls are made on the Serious Injury table. The assignment change still takes place. |
| 6 |
Black Ork Nob has grown so large or built a reputation so renowned they instil Fear in opponents. This skill only functions while this warrior is the mob’s Nob. |
Income
All Ork mobs have access to an income source such as a mine, scrapyard, squig farm etc.. For simplicity, it will be referred to here as a mine. After each battle surviving Mob members may work to produce income for the mob.
Mining
After Injuries and Experience, a Mob determines the Income and Profit it will receive. Each Boy, Yoof and Grot that did not have to roll on the serious injury table, may work in the mines and generate income. Each Warrior sent to the mines generates Income Dice as below:
Ork Boyz - D6
Yoofs and Grots - D3
At most, 10 Warriors can work in the mine, including Slaves (see below).
Bear in mind that Warriors engaged in Mining cannot be sent to track down Special Characters (see the GCE Campaign Book for how to hire Special Characters).
Captives and Mining
If the Mob has a Slaver, Captured Enemy Warriors who are neither ransomed nor exchanged can also be sent to the mines as Slaves. Each Slave sent to the mines generates D6 teef of income after each game, unless otherwise stated (see the captive’s faction pack). Further details can be found under “Gorkers/Morkers with Captives”.
Cave-ins
Sometimes, things can go catastrophically wrong in an Ork mine (no kidding)! A Cave-In is an ever-present risk, increasing with the number of miners causing chaos.
If you roll 3 or more 6s on the mining Income Dice (including a natural 6 on any D3s rolled), the mine has suffered a collapse. Roll a D6 for each Warrior that generated an Income Dice. On a 1 they must immediately roll on the Serious Injuries table. Results of ‘Captured’, ‘Bitter Enmity’ and ‘Gobsmacked’ are treated as a ‘Full Recovery’ in this case. You still collect your Income as normal, despite the Cave-in.
‘Ard Boyz Bonus
As per the Campaign Rules taking on a more reputable Mob and winning gets the Mob an income bonus!
| Difference in Mob Rating |
Bonus |
|---|---|
| 1-10 |
+1 |
| 11-15 |
+2 |
| 16-20 |
+3 |
| 21-25 |
+4 |
| 26-50 |
+5 |
| 51-75 |
+10 |
| 76-100 |
+15 |
| 101-150 |
+20 |
| 151+ |
+25 |
Scenario Income
Scenarios often include additional ways for mobs to earn income, usually in the form of lovely, shiny scrap! When the game ends you should immediately figure out how much income your Mob has earnt from the scenario’s loot.
Any Other Income
There are also a few other incidental ways to earn income (such as stripping a Destroyed enemy Vehicle or inflicting the Gobsmacked Serious Injury on an enemy). The two examples mentioned are in the GCE Campaign Book but your campaigns may provide other income opportunities. Unless specifically stated to be profit all of these are Income and should be part of the profit calculation described below.
Calculate Total Income
Add up the various income totals from the sources described above. This forms your mob’s total income - this isn’t the amount you get to keep!
Profit
As in reality whatever a Mob earns has to pay for things - it’s not all profit.
After each game a Mob will need to pay for a variety of things ranging from ammo, repairs, fuel, their bar tab, and so on. These sorts of costs and calculations are best left to the Sumboyz. Remember to claim your ‘Ard Boy Bonus!
The Income generated gets compared with the size of the Mob which consists of its permanent members and vehicles. Each warrior on the roster counts as one, each vehicle counts as one. Special Characters, hired guns, and other temporary Mob members do not count towards this count unless otherwise stated.
Note: Slaves do not count towards the number of Models for the purposes of the Mob Size chart.
Find the relevant row and column in the table. Where they cross over that’s how much profit the Mob gets. There’s no addition or subtraction involved here - the number is how many teef the Mob gets to keep.
| Mob Size |
|||||||
|---|---|---|---|---|---|---|---|
| Income |
1-3 |
4-6 |
7-9 |
10-12 |
13-15 |
16-18 |
19+ |
| 0-2 |
3 |
3 |
2 |
2 |
1 |
1 |
0 |
| 3-5 |
5 |
4 |
3 |
3 |
2 |
1 |
1 |
| 6-8 |
7 |
6 |
5 |
4 |
3 |
2 |
2 |
| 9-12 |
9 |
8 |
7 |
6 |
5 |
4 |
3 |
| 13-17 |
11 |
10 |
9 |
8 |
7 |
5 |
4 |
| 18-23 |
13 |
11 |
10 |
9 |
8 |
6 |
5 |
| 24-30 |
15 |
13 |
12 |
10 |
9 |
7 |
6 |
| 31-38 |
16 |
15 |
14 |
12 |
10 |
8 |
7 |
| 39-47 |
17 |
16 |
15 |
13 |
12 |
10 |
9 |
| 48-57 |
18 |
17 |
16 |
14 |
13 |
11 |
10 |
| 58+ |
19 |
18 |
17 |
15 |
14 |
12 |
11 |
For example:
Grimlug’z Ladz consist of 2 Traks and 9 Orks. This includes the Drivers and Gunners for the vehicles. That’s a Mob size of 11. In their most recent battle they didn’t get any scrap counters but four of their boyz were able to work in their mine. This gave them a total income of 15 teef.
Looking at the table we can see the 13 - 17 income bracket provides 8 teef of profit for a Mob size of 10-12. This means the Mob adds 8 to its teef hoard which can be spent on whatever the player wants.
Mektown
Mektown is full of places of interest but for this section we’re just going to talk about a few of them that are relevant to running an Ork mob.
Crew Reassignments and Leadership Disputes
Slop Shops And Brewhouses
Being a Driver or Gunner is generally quite a prestigious position. Once a Warrior has the job they’re not going to give it up voluntarily. The traditional way of settling this is by having a friendly chat in a brewhouse. The discussion usually opens with the challenger posing a rhetorical question like “Wot yoo lookin’ at?” followed by extreme violence. The victor gets the position until someone else successfully challenges them and life goes on (assuming the loser had the good grace not to die). This being the socially acceptable way to handle such disputes is never questioned and there’s no shame attached to losing.
In rules terms the primary way to change which Warriors are Drivers or Gunners on your mob’s Vehicles is to have a bar brawl. The winner of the brawl will take their desired position.
The original Driver/Gunner fights a Hand-to-hand Combat with the Warrior you want to replace them with.
The Warriors are not allowed to use any weapons apart from Knuckles and Knives. The Warriors still gain any advantage they would normally have from their Armour and Bioniks.
The Warriors begin in base-to-base contact and neither counts as Charging. The fight continues until one Warrior goes Out of Action (remember if a Warrior goes Down they go Out of Action immediately!).
The Loser rolls Serious Injuries Table as normal. Results of ‘Captured’, ‘Bitter Enmity’ and ‘Gobsmacked’ are treated as a ‘Full Recovery’ in this case.
The only other way to change assignment is if the incumbent crewman skips a game out for some reason (e.g. suffering the effects of an Old Battle Wound acting up). Under those circumstances you may substitute in another crewman who will then become the “official” holder of the position from then on.
Kicked To Da Kurb
Orks are not renowned for their sense of family honour. Occasionally, a member of a mob may become too battle scarred, too full of old battle wounds and, quite frankly, a pure liability. A Nob may decide to kick a Warrior from the mob altogether, but often they won’t go without a fight.
At the end of each game, after income has been determined, you may attempt to remove a single Warrior from your roster. You may not remove any of their equipment before resolving this.
If that Warrior is an Ork or a Digga (see the advanced rules for recruiting Diggas), then your Nob must challenge them to a Pit Fight (below) and win. This takes place after any leadership challenges.
If your Nob wins, then the Warrior is removed from the roster. In addition, roll a D6. On a 5+, you may keep the Warrior’s equipment and may either give it to other members of the mob, or add it to your stash.
If your Nob loses, then the Warrior remains in the mob. You may attempt to kick the warrior out after your next game if you wish.
If the Warrior being removed is not an Ork or Digga, they are removed automatically along with all the equipment that they had (sneaky, thievin’ gits).
Nobs may not be removed. They must be unseated in a Leadership Contest, and then beaten in a Kicked to the Curb Pit Fight after a subsequent game.
Pit Fights
The largest Ork usually rule over their smaller brethren without question but sometimes it is just too hard to tell who is the largest, meanest, strongest of the lot. That’s where Pit Fights come in and are used to settle this dispute by way of ritual combat.
Who Fights?
If any Ork Warrior’s Leadership characteristic exceeds that of the Nob that Warrior will challenge the Nob for command of the Mob.
It is possible that two or more Warriors will reach this threshold at the same time. In that case, randomly determine which challenger will fight the existing Nob first. If the existing Nob wins the Pit Fight against that challenger, the next (randomly selected if necessary) challenger until no more challengers remain, or a challenger beats the existing Nob and becomes the new Nob.
If a challenger wins a fight, they become the mob’s Nob. If a challenger still remains with a Leadership characteristic higher than that of the new Nob, Pit Fights are fought until there are no challengers remaining.
Additionally, the death of a mob’s Nob may trigger a Pit Fight. If a mob’s Nob dies, the Warrior with the highest Leadership characteristic will take over. If there are multiple Models with the same highest Leadership characteristic, the two with the most XP will Pit Fight to decide the mob’s next Nob.
The Pit Fight
Pit fights get their name from the fighting pits found in every Ork settlement. They’re not only used to settle disputes like this but also for entertainment. Nothing like a bit of gladiatorial combat and free-flowing fungus beer on a hot day!
Unlike a bar brawl these establishments are a bit more organised and the parameters of the fight will vary depending on what the pitboss has scheduled for the day.
To determine the type of Pit Fight, roll on the Pit Fight table below:
| D6 |
Result |
|---|---|
| 1-2 |
Shooty
The two Warriors are equipped as normal. They start 16” apart. Roll a D6 each with the winner getting the first turn. They may move around the arena and engage in Hand-to-Hand Combat as normal (in addition to Shooting). |
| 3-4 |
Cunnin’ The two Warriors can use only the Hand-to-Hand weapons they own. They keep all their armour and bioniks. They start in base-to-base contact and neither counts as Charging. |
| 5-6 |
‘Ard
The two Warriors have no Hand-to-Hand weapons apart from Knuckles and Knives. They keep all their armour and bioniks. They start in base-to-base contact and neither counts as Charging. |
The Loser rolls Serious Injuries Table as normal. Results of ‘Captured’, ‘Bitter Enmity’ and ‘Gobsmacked’ are treated as a ‘Full Recovery’ in this case.
Pit Fight, Bar Brawl and Kurb Kicking Experience
Warriors who take part gain +5 Experience for each Wounding Hit they inflict on their opponent and an additional D6 Experience Points for taking part. If this allows them to Advance, go through the Advancement process immediately.
Da Job Pole
This is where you hire new members of your Mob, in exactly the same way as described in the “Creating a Mob” section above. The same limits for each type of warrior apply and new mobsters can’t have any kustom jobs or bioniks until after their first battle.
Special Characters
Ork Boyz can be sent to track down Special Characters if you wish (as mentioned earlier - they cannot do this and engage in Mining). Special Characters can also show up before a game, as described in the GCE Campaign Book. Either way, Gorkers and Morkers can recruit the following Special Characters:
- Outlaw Painboyz
- Mega Cyborks
- Deffkopta Meks
- Weirdboy Scrap Hunters
Rules for these Special Characters can be found in the GCE Campaign Book.
Da Bazaar
Mektown has multiple sprawling bazaars full of traders with varying levels of scruples. Supplies, equipment, pre-built gubbinz, and all manner of other things can be sourced here.
Between games your mob can visit and purchase new equipment for their warriors and vehicles. If purchasing gubbinz then a Spanner is required - if all of yours went Out of Action in the previous game they’re not going to be up to the task of fitting Gubbinz to your vehicles. You can still buy the Gubbinz, should you so choose, but they’ll have to remain in your hoard until they can be fitted.
You’ll also need to model any new kit you give your mob - try not to make other players memorise your loadouts!
Selling (Hoarding & Swapping)
You can also choose to sell weapons and equipment at half value, rounding down. If the resulting value is less than one toof then the items have no resale value. Alternatively you may hoard or swap them around the mob. Hoarded weapons, equipment and vehicles do not count towards Mob Rating.
Death of a Specialist
Deaths and destroyed vehicles follow the standard rules. Spanner and Slaver specialists have their own additional rules.
Death of a Spanner
When a Spanner dies and you have excess Vehicles that can no longer be adequately maintained you must either Hire a new Spanner, sell the extra Vehicle(s) for half their cost like selling equipment, or mothball them in the Fort. Mothballed Vehicles cannot be used in any capacity until you have enough Spanners to maintain them.
Death of a Slaver
When a Slaver dies Slaves and Grots do not generate Income. Additionally you may not hire additional Grots until you have a new Slaver, However, on the battlefield you may continue to use any Grots already in your Mob as normal.
Gorkers/Morkers with Captives
On the whole Gorkers and Morkers work as described in the GCE Campaign Rules regarding the capture of Warriors or Vehicles. There are a couple of exceptions however.
Slaves
Captured enemy Warriors can be put to work in the mob’s mine as Slaves (see the Income section for details). Slaves can be freed by playing a suitable Rescue scenario (such as One of Our Ladz is Missin’) against the mob the Warrior belongs to. Until they are freed they remain Slaves and earn income for their captors, assuming that mob retains a Slaver to keep them working.
If the Captive is exchanged or ransomed then their weapons and equipment return to their mob with them. If they become Slaves then their weapons and equipment goes to the mob that captured them.
Da Mekboy’z Workshop
Mekboys are equal parts mechanic, inventor, and swindler. Brilliant in their own ways and they know it. They consider almost any job “open to interpretation” but, conversely, this can sometimes lead to spectacular results.
Orks are risk takers by nature so this arrangement works on the whole. For every bit of wiring that catches fire there’s an engine purring like a well-fed squig. Weapons can be made deadlier, vehicles faster, and so much more besides. Hand over the kit and brace your wallet!
Note: your mob may not have kustom jobs from Meks until your Nob has won a game!
We Can Do It!
After your game has finished and your Mob is ready to visit Mektown you may take any weapon or vehicle to have one kustom job done.
Eligible Weapons: Restrictions apply, see Ork Gunz and Big Gunz in the Armoury Appendix.
Kustomised Weapon options are:
- Shootier (+1 Strength)
- Longer Range (+6” Total Range)
- More Dakka (+1 Sustained Fire Dice)
Note: Linked Weapons count as a single Weapon.
Kustomised Vehicle options are:
- Getting It Fixed (Remove Permanent Damage)
- Faster (+3” Thrust)
- Smarter (+1 Ld bonus on turns)
- ‘Eavier (+1 Armour)
If you have Warriors with Bioniks then you may be able to have them Kustomised too. Meks will not fit Bioniks, you need to see a Dok for that (see ). Your options are:
- Shoota Arm - Shootier, Longer Range, More Dakka
- Trak/Wheels - Faster, Smarter
- Cybork Body - ‘Eavier
Once you’ve nominated your desired job, roll on Da Big Day Table and see how things went:
| Da Big Day |
|
|---|---|
| D6 |
Result |
| 1 |
We Adda Bitta Trubble. Uh oh. The Mek has made things worse. Roll on the Bodge Table. Despite the mishap the Mekboy still demands D6 teef for his work. |
| 2 |
While we Wuz at It… The Mek has found something to repair instead which has been done without your consent. Your original request has been forgotten about, unless it was to fix a piece of Permanent Damage. If there is more than one randomise which one is repaired. The Mekboy still demands D6 teef for his work. |
| 3 |
Can’t Get da Parts. The Mekboy has done nothing but charges nothing. |
| 4-6 |
Job’s a Good ’Un. Hurrah! The Mekboy completed the work successfully. You are presented with a bill for D6 teef. Refer to the Weapon or Vehicle’s Job’s a Good ’Un section. |
Da Bad Nooz - Meks
Except for Can’t Get Da Parts you must pay your bill (D6 teef) immediately. Note: The teef paid to the Meks is not added to the Weapon or Vehicle’s value - see the Job’s A Good ‘Un section. If you can’t afford to pay your bill the Mekboy confiscates your Weapon/Vehicle until you’ve paid your bill. Remove their value temporarily from your Mob Rating until you’ve paid.
Bodged Jobs
The work has been bodged but you won’t find out how badly until you start a new game. When you attempt to shoot (or drive) the bodged Weapon (or Vehicle) roll on the relevant Bodge Table.
| Bodged Weapon Table |
|
|---|---|
| D6 |
Bodge |
| 1 |
Just Don’t Ask Where to even start. That bit wasn’t supposed to fall off and there’s this whole section missing… The Weapon is unusable. |
| 2 |
Bits Left Out It turns out the parts left over weren’t spare… The Weapon shoots once like normal then falls to bits in the Warrior’s hand. |
| 3 |
Sights Bodged It’s fine if you squint, I guess? Short and Long Ranges reduced by half (rounding down). |
| 4 |
Aim Bodged The trigger feels all wrong and it’s jumping about like an agitated herd squig! All shots made by the Weapon are at a -1 to Hit. |
| 5 |
Rapid Fire Mechanism Bodged The Weapon loses its Full Auto function. If it didn’t have one to begin with it now requires an Ammo test every time the Weapon is fired. |
| 6 |
Ammo Feed Bodged Any Ammo rolls automatically fail. Still test for Exploding Weapons. |
| Bodged Vehicle Table |
|
|---|---|
| D6 |
Bodge |
| 1 |
Thrusters Bodged Thrusts only succeed on a 4+. Anything less than that is a failure. This includes the first thrust for Small Ork Vehicles. |
| 2 |
Wheel/Tracks Bodged Turning under gas engines (including slow speed manoeuvres) is incredibly difficult. You must pass a Leadership test each time you want to turn. Failure results in the Vehicle moving D6” forward and then stopping (this does not end the Vehicle’s move like a failure on a Thrust roll). You may still turn using thrusters as normal. |
| 3 |
Gas Engine Bodged Gas Engine moves are halved (rounding up). |
| 4 |
Gears Bodged The low gears of the Vehicle are well and truly massacred. If you wish to undertake a Slow Speed Manoeuvre you’ll need to roll D6 first. On a 4+ the gearbox survives and you may make the move - otherwise the gearbox gives up and the Vehicle is immobilised! |
| 5 |
Fuel Injector Bodged Each time your Vehicle makes a Thrust move there’s a chance that the Thrusters will gum up, preventing any further Thrust moves from being made during this game. This happens if you roll a 1 on a Thrust test. |
| 6 |
Brakes Bodged The only way this Vehicle is stopping is if it becomes Immobilised! Each turn you must use your entire gas move. You can use your Thrusters if you’d like, they aren’t affected. Slow speed manoeuvres are impossible. |
Getting’ Bodges Fixed
Once you have fielded the weapon or vehicle in a game the bodge is automatically sorted. This costs you nothing and does not prevent another job. The embarrassed Mek tries to make excuses but ultimately concedes and completes the original job you requested.
Job’s A Good ‘Un - Weapons
-
Shootier: +1 Strength
-
Longer Range: +6" Total Range
-
More Dakka: +1 Sustained Fire Dice
Note: The first upgrade (of each type) adds +5 teef to the Weapon’s Value. Second and subsequent upgrades do not but will incur performance loss. These effects are cumulative.
| Weapon Performance Loss Table |
|
|---|---|
| D6 |
Compromise (reroll any results that are the same as the upgrade just received) |
| 1 |
Slowed Fire The Weapon loses a Sustained Fire Dice. If this takes the number to zero the weapon now fires a single shot. If it fired a single shot it becomes ‘Move or Fire’. If it was already ‘Move or Fire’ the weapon is now useless - remove it from your roster. |
| 2 |
Ammo Guzzler The Weapons Ammo rolls are now ‘Automatic’. If it's already Auto roll again for a different effect. |
| 3-4 |
Kicks Some All shots made by the Weapon have a penalty of -1 to Hit (Both Short and Long Range). |
| 5 |
Sawn Off Weapons with a Total Range greater than 30” are reduced to a Maximum of 24”. All other Weapons lose 6” off their Total Range. Short Range is not affected. |
| 6 |
Lightweight The Weapon’s Strength is reduced by -1. |
Job’s A Good ‘Un - Vehicles
-
Getting It Fixed (Remove one type of Permanent Damage e.g. all Unreliables)
-
Faster +3" Thrust. (Maximum of 9”)
-
Smarter +1 Ld bonus on turns
-
‘Eavier +1 Armour to all Hit Locations
Note: The first upgrade (of each type) adds +5 teef to the Vehicles Value. Second and subsequent upgrades do not but will incur performance loss. These effects are cumulative.
| Vehicle Performance Loss Table |
|
|---|---|
| D6 |
Compromise (Roll again any results the same as the upgrade just received) |
| 1 |
Lighter Armour All Armour Values are reduced by -2. |
| 2 |
Stripped Armour All Armour Values are reduced by -1. |
| 3-4 |
Dodgy Steering The Vehicle Driver suffers a -1 penalty to Leadership tests required to turn. |
| 5 |
Smaller Thrusters The Vehicle’s Thrusters suffer a -3" penalty. If the Thrusters are reduced to 0 then they may not be used at all. |
| 6 |
Smaller Gas Burners The Vehicle Gas Engine suffers a -3'' penalty. Remember when a Vehicle turns it moves up to half its maximum move, turns once, moves up to half its maximum move again and turns a second time. If the Gas Engines are reduced to 0 then only Thrusters may be used (if available). |
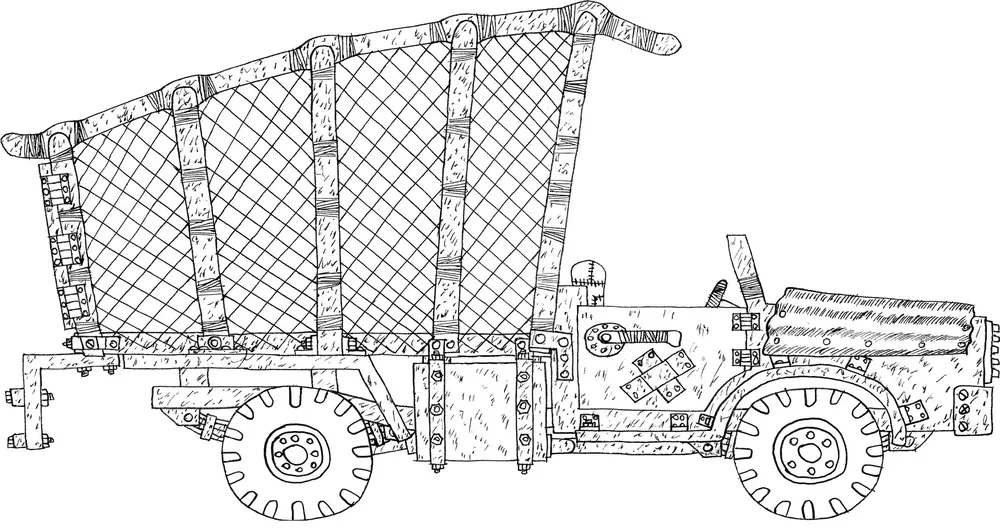
‘You can always spot the newbies’ Mekboy Nutzembolts thought to himself as he waved to a group of approaching orks. Although he dressed the part their Nob was new to the position and his mob were just starting out. An easy sale.
After the introductions, basic grunting, and boasting, Nutzembolts directed them across the lot, past many other vehicles to a large, blackened trukk.
“Dis is the one for you, my friend.”
“Hmmph. Don’t look dat impressive,” the Nob barked back.
“Well, da previous owner had such good krumpin’ with it dat ‘e could afford to trade it in for a bigger model. A faster model. A redder model.”
The Nob’s eyes lit up at the prospect of getting a trukk that had already proven itself. It had to be good if the previous owner was red-paint level of success. He made a face as he thought about it and his ladz crawled all over the vehicle to check it out.
“Is dat so?” the Nob inquired.
“Yes.” Nutzembolts said, lying through his teef, grinning. “Yes, it is.”
“Oi!”
One of the ladz had the engine bay open, “the exhaust has a ruck of holes in it!”
The Nob looked over to Nutzembolts for an explanation.
“Uh...” he stumbled, “dat’z why it’s worth more.”
The Nob nodded as if he understood entirely. He paused briefly as if in thought (a rare moment for him, surely).
“I’ll take it,” he declared, handing over a pile of teef. He didn’t even ask the price or try to haggle. Or even count the teef! Typical newbie, a thrilled Nutzembolts thought.
“We also do gubbinz. If you need any extras. For an additional fee of course,” he said, trying to milk this cash-squig.
“If it wuz good enough for dat uvva mob before us, den it’z good enough for us!” the nob proudly stated, satisfied with his purchase.
‘Zoggin’ heck!’ Nutzembolts thought, cursing himself under his breath for putting too good a spin on it.
“Oi,” the Nob gestured to open back of the trukk. The very open back of the trukk. The it-was-clearly-open-backed-at-one-point-then-got-exploded-even-more-open open topped trukk.
“How are me ladz supposed to stay on?”
“Well, dey just hang on,” Nutzembolts said, already completely done with the conversation as it was clear he wasn’t going to be getting any more teef.
“What’s to stop them from falling out of the back?” the Nob asked.
“Da fear of falling off, mainly.”
“My boyz ain’t afraid of anything!” the Nob barked back, proudly slapping his chest with his fist.
“Den I guess then they’ll fall off a lot...” Nutzembolts replied absently, counting his new bag of teef.
Dok’s Serjery
Orkoid physiology is something spectacular to behold. Many of their organs are, strictly speaking, optional. They don’t have to concern themselves with tissue typing, blood types, or similar biological fussiness. That said, body parts do not grow back and it’s entirely possible to sustain injuries that require a bit more “serjical” intervention.
As you might expect from dealing with other Oddboyz, Doks are highly focussed on their area of expertise and not so much on the interests of their patients. They want to see whether the latest refinement to their procedure works properly or not. Getting them to help deal with a specific ailment is a bit hit and miss as a result.
After a game once you are ready to visit Mektown you may take an injured Ork or Grot to a Dok’s serjery. The injury suffered can be new or old; it doesn't matter to the Dok. Here you can request one of four kinds of “serjery”, each with its own Serjery Table:
- Kustom Arm Replacement - Heals Arm Wounds
- Kustom Leg Replacement - Heals Leg Wounds
- Rebuilt Kranium - Heals Head Wounds
- Kustom Orculars - Heals Blinded In One Eye
- Dok’s Surprise!!! - Heals Chest Wounds or Old Battle Wounds
Pick a procedure then roll on the “Iz It Safe Table” to see what happens.
Da Dokz’ Kode
All Doks have sworn a “hypocritic” oath and will not mess with another Dok's work once it has been done. You cannot replace or remove Bioniks or have more than one of the same type (e.g. two Kustom Arm Replacements). However the bioniks they are stuck with will prevent injuries of the same kind from happening again in the future. If the Warrior receives that specific limb injury again, treat it as a Full Recovery result (i.e. a Warrior with a bionik left leg could ignore future injuries to the left leg but a right leg injury would be applied as normal). A further injury to that body part (such as the right leg in the previous example) is permanent and will not be treated by a Dok.
Meks may work on some bioniks, see Da Meks Workshop - We Can Do It!
| Iz It Safe Table |
|
|---|---|
| D6 |
Result |
| 1 |
Dis Is A New Technique Uh oh. The serjery has been well and truly messed up. The Dok still demands D6 teef for his work though. In the next game when the Warrior attempts to move or shoot, whichever happens first roll on the Eksperiment Table. |
| 2 |
Da Patient is Restin’... The serjery was a success but the Warrior is still unconscious. They will miss the next game. Roll on the appropriate Serjery Table and pay the bill for D6 teef now. |
| 3 |
Klose enuff! The Dok was either not listening or not interested. He’s done serjery on a different body part instead! Randomly pick one of the other Serjery Tables and then roll to see which procedure was completed. The Dok still demands D6 teef for his work. |
| 4-5 |
Rooteen Serjery The Dok looks almost as surprised as you are but he gestures at the patient as they wake up with their shiny new bionik upgrades. After wiping the gore on his apron he presents you with a bill for D6 teef. Deduct this from your Mob’s hoard and roll on the appropriate Serjery Table. |
| 6 |
Profeshunnal! You’ve managed to catch the Dok during a rare moment of concentration and he paid close attention when treating the patient! As above but there is no need to resolve whether the Dok operated on the correct limb/body part (see Which Wun Wuz It? below). |
Da Bad Nooz - Doks
You must pay your bill (D6 teef) immediately. Note: The teef paid to the Dok is not added to the Warriors value, see Serjery Tables. If you can’t afford to, the Dok will ‘take care’ of your Warrior until you scrape together the cash. Remove their value temporarily from your Mob Rating until you’ve paid.
| Eksperiment Table |
|
|---|---|
| D6 |
Eksperiment |
| 1 |
Eksperimentation The Dok has performed an eksperimental technique on the Warrior, but halfway through the operation got bored and decided to try something different… The Warrior gains no bionik bitz and what's worse must roll on the Serious Injuries Table. Reroll results of Bitter Enmity, Captured or Dead. |
| 2 |
Not Enough Nailz The Warrior’s new bionik was creaking a bit but the Dok insisted that it was just aklimatin’... As soon as the Warrior attempts to use it the magic blue smoke escapes and the Warrior is immediately taken Out of Action. |
| 3 |
Duuuuh… Wow, this lad was really down there deep for the serjery! In fact he’s not really come back yet… Unless there’s a friendly Warrior within 2” of him he may not do anything. If there’s a friendly Warrior to babysit him he may move or shoot as normal. He may take part in Hand to Hand Combat as normal. |
| 4 |
Sumfink’s Missin’ The warrior just isn’t feeling himself after the serjery - probably ‘cos the Dok nicked a bunch of his innards! They’re sat in a jar back in the Klinik and the Warrior is at -1 Toughness for this game. |
| 5 |
My Brain ’Urts The Dok’s eksperimental brain serjery has inflicted a Head Wound on the warrior, as described in the GCE Campaign Rules. |
| 6 |
Steel Teef The warrior wakes up to find that something is terribly, terribly wrong! His cherished gnashers have been swapped with metal ones by that crook of a Dok. The Warrior is immune to the Gobsmacked serious injury from now on but also suffers a permanent -1 Leadership. |
Corrective Serjery
Once you have fielded a Warrior affected by the Eksperiment Table they are automatically sorted, except for My Brain ‘Urts which lasts another battle and Steel Teef which are permanent. As well as fixing his mistake, the Dok also does the surgery you originally went in for, roll on the appropriate Serjery Table. This costs you nothing but any additional serjery cannot be performed on the Warrior until after the next game.
Which Wun Wuz It?
A Dok’s enthusiasm for his craft is terrifying (Like the infamous Doktor Ragebert Mekton who once managed to not only kill his patient but also one of his orderlies and a random bystander, all in a single serjery!). Unfortunately their ability (or willingness) to follow instructions is not quite so well developed. Each time an injured warrior is taken in with an Arm Wound, Leg Wound, or Blinded in One Eye you must roll a D6 to determine which receives surgical attention (1-3 Left, 4-6 Right).
Serjery Tables
| D6 Added Value |
Kustom Arm Replacement |
|---|---|
| 1 +0 |
Hook Arm The Warrior’s arm has been replaced by a cobbled together hook contraption. It’s not much good for Close Combat but at least they can still steady a shoota. The Warrior suffers a permanent -1 Weapon Skill and cannot use two-handed Hand-to-Hand weapons. They may continue to use Gunz that require two hands. |
| 2 +1 |
Kutta Arm Instead of a prosthetic hand or claw the Warrior now has a big knifey thing for an arm! It counts as a Choppa. The Warrior may not use two-handed weapons of any kind. |
| 3 +2 |
Telescopic Arm The Dok has replaced the arm with an extendable one! If this Warrior is Charged the Attacker loses -D3” as they are pushed back (potentially failing the Charge). The Warrior also gains +1 Initiative in Close Combat and when attempting to Board Vehicles. The Warrior can use two-handed weapons as normal. |
| 4 +3 |
Shoota Arm The Warrior now has a snazzy looking Shoota for an arm which can be upgraded at the Meks Workshop. Nothing else may be held in the Shoota Arm. |
| 5 +4 |
Grapple Arm The Warriors arm is now a spring-loaded scorpion hook! The grapple may be fired in the Shooting Phase instead of another weapon, at a Vehicle, Warrior or Small Target up to 8" away. Roll to Hit as usual using the Warriors BS. If a Vehicle is Hit the Warrior automatically and immediately Boards the Vehicle. If a Warrior is Hit, compare Strength, if the Target’s is equal or lower they are pulled towards you into Close Combat. If the Target’s is higher they yank you towards them instead. Small Targets, if Hit, can be used to reposition yourself, including high up places. After each shot the grapple immediately resets back into the arm and will be ready to fire again in the next turn. No Ammo roll is needed. Nothing else may be held in the Grapple Arm. |
| 6 +5 |
Klaw Arm Every Ork dreams of owning one of these - most would give their right arm for one! Hugely powerful pneumatic pistons allow the owner to crush whatever they want with ease. It may only be used in Close Combat and counts as one handed. It is User Strength x2, -3 Save Modifier and Damage 2. No other weapon may be held in the Klaw Arm. |
| D6 Added Value |
Kustom Leg Replacement |
|---|---|
| 1 +0 |
Peg Leg A crude leg replacement. Only a Freebooter would be happy with this outcome. The unfortunate Warrior’s Movement is reduced by -1". |
| 2 +1 |
Bionik Leg State of the art Orky teknologee. Just as good as the Warrior’s old leg but ‘arder! |
| 3 +2 |
De-Lux Kicking Leg Like a normal bionik leg but with a kick! The Warrior’s kicks now have the power of punches. A Warrior with a De-Lux Kicking Leg gains an extra Attack in Close Combat at user Strength. |
| 4 +3 |
Telescopic Legs These legs are something special - extra height without having to worry about door frames. A twitch of a nerve and the legs extend allowing the Warrior to see over tall obstacles (up to 4”) including for shooting purposes. A Warrior with Telescopic Legs also adds D6" to their Run or Charge move. This extra distance should be rolled each time such a move is taken and is added after their normal Movement is doubled. This bionik replaces both legs. |
| 5 +4 |
Gyro-Stabilised Monowheel Why have legs when you can have a powered unicycle instead? Well, lots of reasons, but that’s what the Warrior now has! Increase the Warrior’s Movement characteristic by +2. They may not move over Difficult or Very Difficult Ground. If they end up there they are effectively immobile for the rest of the game. The Warrior may not engage in boarding actions and cannot climb things (e.g. ladders). For reinforcement purposes they count as a vehicle. This bionik replaces both legs. |
| 6 +5 |
Traks/Wheels Plentiful around the area of Mektown, traks or wheels are used by the Doks to replace the Warriors’ legs. A fighter with this outcome gets to choose what to have. Traks and wheels follow the same Movement rules as their bigger counterparts. However the Warrior can still be squashed like other Models on foot and is unable to Ram but can still Charge. The Warrior is unable to get on board any other Vehicle or climb up walls/ladders and counts as a Vehicle when using reinforcements/reserves in scenarios. No other Model may be transported on the Warrior. The Warrior can visit the Meks to be made Faster or Smarter once. Other actions like Shooting and taking Damage, use the same rules as normal. This bionik replaces both legs. |

| D6 Added Value |
Rebuilt Kranium |
|---|---|
| 1 * |
Squig Brain Transplant Is there something a little… different about the Warrior? He really doesn’t seem like himself since the serjery… Little do the Mob know that their mate’s brain is long gone. Either for “research” or just a bit of a laugh the Dok has replaced the Warrior’s brain with that of a squig! Roll a D6 to find out what kind of squig brain your Warrior has in his head. D6 Squig 1 Herd Squig (*+0) Herd squigs are used by Slaverz to round up stray Gretchin. They are ferocious creatures but cannot think for themselves and always act on orders. A Warrior with a Herd squig for a brain is subject to Stupidity. 2-4 Face-eater Squig (*+2) Face-eater squigs are just plain nasty. They like to hang around on their own and attack anything that bothers them, including Orks! They are hard to befriend, but are very loyal and will defend their masters to the end. A Warrior with a Face-eater squig for a brain Hates all enemy mobs. 5-6 Buzzer Squig (*+4) Buzzer squigs are the most angry and hungry of all squigs. They fly around in swarms and eat anything that gets in their way. A Warrior with a Buzzer squig for a brain is subject to Frenzy. Regardless of the result all characteristics on the Warrior’s profile are halved (rounding up). The Warrior can continue to be part of the Mob as normal otherwise, gaining experience and so on. He’s probably not much of a conversationalist if he ever was though… |
| 2 +1 |
Staples & Glue It’s not the prettiest solution by far, and it’s not quite as techy as a bionik eye, but the crude surgery is a success, and whilst it offers no bonuses, at least the Warrior is cured of their Head Wound. Unlike other results, this does not prevent you from receiving further injuries to the head. |
| 3 +2 |
Steel Horns Whilst the Warrior will now struggle to find hats that fit he does have a rather nifty set of horns! When charging he receives an extra Attack at user Strength! |
| 4 +3 |
Steel skull Crude steel plates have been nailed to the Warrior’s skull. It looks ded ‘ard and as a result the Warrior gets a permanent +1 to his Leadership. |
| 5 +4 |
Explosive Kranium The Dok has wired a blast-proof cradle for a frag charge into the Warrior’s head. The trigger is the Warriors blood flow - should the Warrior be taken Out of Action' the charge explodes away from them! Treat it as a Frag Stikkbomb. Place the Template over the affected Warrior and resolve. If this Warrior is involved in Hand-to-Hand Combat then apply the explosion as described in the Might Explode rules. If either Warrior has the ‘Eadbutt skill, the charge explodes and they are both taken Out of Action immediately as they absorb the force of the blast (do not use a template). Assuming the Warrior recovers then the charge will be replaced for free! |
| 6 +5 |
Iron Mask The contents of the Warrior’s head have been patched up and poured into a metal shell made in the image of Gork (or Mork). Their new face is thoroughly unpleasant to look at and the Warrior now causes Fear and is immune to the Gobsmacked serious injury. |
| D6 Added Value |
Kustom Orculars |
|---|---|
| 1 +0 |
Squig Eye The Doc has only done half a job and thumbed in an eye pulled from one of the many squiggly beasts that inhabit the area. Although the Warriors' vision is restored it isn’t as good as before. They can make out blurry shapes and are sensitive to light (best hold onto that eye patch). The Warrior no longer counts as blinded but the -1 to Ballistic Skill remains. |
| 2 +1 |
Spare Parts! A more suitable transplant donated by one of the Docs previous patients (without consent of course). It seems to have worked though! The Warriors vision has been restored and the Warrior no longer counts as blinded! |
| 3 +2 |
Telescopic Eye The Doc has gone that little bit extra and fitted a Telescopic Eye which allows the Warrior to see targets at long range but not a lot else. When shooting at Targets more than 18” away the Warrior receives a +1 to Hit modifier. The Warrior no longer counts as blinded. |
| 4 +3 |
Periscope The Warrior has received a periscope for an eye that can be raised up or around corners, extending vision by 3” and +3 Initiative (making it harder for enemy Warriors to Hide). Additionally if this Warrior teams up with another as a “spotta’” they confer a +1 to Hit when the Warrior they’re spotting for shoots (so long as they remain within 2” of each other). The Warrior no longer counts as blinded. |
| 5 +4 |
Bionik Eye The Doc has replaced the Warrior’s eye with a special bionik part known locally as a “gitfinda”. It has a built in crosshair and a rangefinder to allow the Warrior to shoot betta’. The warrior gains +1 to Hit when Shooting with any weapon. The Warrior is no longer affected by blindness. |
| 6 +5 |
Auto Senses The Warrior’s eyes have been completely removed and replaced with some hi-tech looking lenses and sensors that confer a +1 to Hit as well as night vision and the ability to see without penalty through sandstorms, smoke, etc.. The Warrior is no longer affected by blindness. |
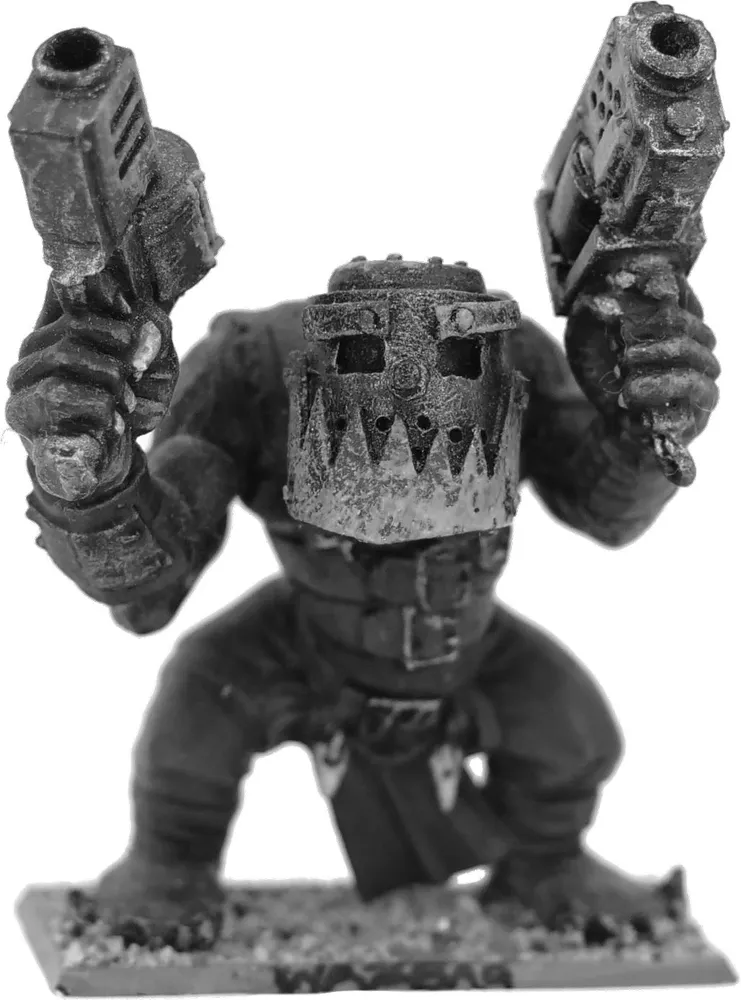
| D6 Added Value |
Dok’s Surprise |
|---|---|
| 1 +0 |
Iron Lung Whilst the Warrior can breath as normal most of the time the amount of staples, plates, and stitching in their lungs is a bit much when they try to run. The Warrior’s Movement characteristic is treated as have a -1” penalty when calculating Run or Charge moves (i.e. M4 means a 6” Run/Charge). |
| 2 +1 |
Kustom Thrusta Boosta The Warrior finds he now has a big red button in the middle of his chest - pressing it ignites a boosta rokkit in his back! The off switch is conspicuously absent… Once per battle the Warrior can choose to ignite their Kustom Thrusta Boosta. They immediately make a Thrust move like a vehicle - then another, and another, until they fail their Thrust test. They may make turns just like a vehicle thrusting and Driving skills can be used if the Warrior has any that are relevant! Once the Warrior fails their Thrust test, resolve the roll on the Thruster Buster Table and end their movement. A Warrior with a Kustom Thruster Boosta may not have any Kustom Leg Replacements. If the Warrior already has a Leg Bionik, Reroll. |
| 3 +2 |
Fungus Bref Lungs All those late night squig kebabs have finally caught up with the warrior. The Dok has had to fit a brewboy fermentation rig inside the lad’s guts! The belches he’s now capable of could floor a stink squig and he knows it. Any enemy fighting this Warrior in Close Combat suffers a -1 to their Weapon Skill due to the noxious stench! |
| 4 +3 |
Fuel Injection Implant Orkoid biology is a strange thing and it turns out that fungus fuel is (mostly) compatible with their biochemistry. Who knew? Well, this Dok suspected at least and has wired up a fuel injector for the warrior! At the start of the player’s turn they must Declare whether the Warrior is using this bionik or not. If so their Movement and Initiative characteristics are increased by +2 but they must roll a D6. On a result of 1 they immediately go Down (on any other result he’s fine). The Fuel Injection Implant can be used every turn - it doesn’t run out. |
| 5 +4 |
Armour Plating The patient's body is almost entirely covered with steel plates riveted to his flesh, patching up the holes in him. This confers an extra +1 to his Toughness. |
| 6 +5 |
Cybork Body Sometimes you might as well pretty much start over from scratch as far as this Dok’s concerned. Worry not, we can rebuild him - we have da teknolojee, although it ain’t going to be pretty. Working up from a metal endoskeleton and making liberal use of plating and pistons the lad is now pretty much unkillable. Instead of a Wound or Toughness value the Warrior now has an Armour Value of 9. If any Hits Penetrate the Warrior’s Armour roll a D6. On a roll of 1-3 the Warrior is unharmed but on a 4+ the Warrior explodes spectacularly and is taken Out of Action! The Cybork Warrior may not wear any other form of Armour but the Meks can make them ‘Eavier once. If a Cybork Warrior gains an Advance to their Wounds or Toughness, reroll for a different result. |
Advanced Rules
The previous part of this pack covers what we consider the “vanilla” rules for Gorkers and Morkers. This section contains various things that can be treated as optional extras. You may want to check with your gaming group to see whether everyone is okay with you using rules from this section.
Digga Outcasts
On Angelis there’s a population of humans that idolise the Orks. More than anything they wish they were Orks. Many band together and form Diggamobs (led by a Digganob, naturally). Others make their way to Mektown and try to find a place in Ork society - hoping to eventually join a real Ork mob.
We’re going to refer to these Diggas as Digga Outcasts, mostly to make it clear that they’re distinct from the Diggas found in normal Diggamobs. If anything they’ve cast themselves out in the hope of fulfilling their dreams rather than being rejected by their own society.
There may well be other (somewhat feral) humans that would see the same light on other worlds and the same rules could be used for them. For more information on the “normal” (using the term loosely) Diggas you should take a look at the faction rules for Diggas.
Digga-Boyz
Humans who have enough experience of surviving in the wastes to be fairly decent fighters. Nowhere near as tough as a proper Ork Boy, of course!
Digga-Yoofs
Wide-eyed human youths with a thirst for adventure and absolutely no idea what they’re signing up for!
Digga Shaman
These Diggas are a little bit magic with a mystical connection to the ground they emerged from. As their careers go on latent psychic powers tend to surface in these unusual individuals.
Recruiting Digga Outcasts
An Ork Mob might find itself a bit down on its luck or have a theory that Diggas aren’t dirt-scrabbling wannabes. Assuming the Mob contains a Slaver then Diggas can join.
No more than half the Mob may consist of Diggas.
Unfortunately the Meks aren’t quite so open-minded and will turn their noses up at such un-Orky behaviour.
Until your mob’s rating exceeds 200 all rolls on the Da Big Day table for repairs and Kustomisin’ are done with a -1 modifier.
Digga-Boyz - 4 teef
| M |
WS |
BS |
S |
T |
W |
I |
A |
Ld |
|---|---|---|---|---|---|---|---|---|
| 4 |
3 |
3 |
3 |
3 |
1 |
3 |
1 |
7 |
Pinning: Digga-Boyz are subject to Pinning.
Equipment: Hand-to-Hand, Gunz, Stikkbombz, and Armour
Digga-Yoofs - 2 teef
| M |
WS |
BS |
S |
T |
W |
I |
A |
Ld |
|---|---|---|---|---|---|---|---|---|
| 4 |
2 |
2 |
3 |
3 |
1 |
2 |
1 |
7 |
Experience: When Digga-Yoofs reach 21 experience points they become Digga-Boyz. Their cost does not need to be updated when this happens. From then on their access to weapons, skills, and so on are those of a Digga-Boy.
Pinning: Digga-Yoofs are subject to Pinning.
Equipment: Hand-to-Hand and Gunz
Digga Shaman - 8 teef
| M |
WS |
BS |
S |
T |
W |
I |
A |
Ld |
|---|---|---|---|---|---|---|---|---|
| 4 |
3 |
3 |
3 |
3 |
1 |
3 |
1 |
7 |
Pinning: Digga-Shamans are subject to Pinning.
Equipment: Hand-to-Hand, Gunz, Stikkbombz, and Armour
Findin’ Rod: Digga-Shamans join the Mob carrying a Findin’ Rod. It may not be sold and if lost for some reason the Digga-Shaman will create a replacement before the next game.
Mind Powers: Digga-Shamans have access to the Shaman Abilities table.
Ceremony of Searching: A Shaman Outcast can provide additional income for the mob as detailed in the Shaman sections below.
Scavenging for Tek: Being so far from the Pyramids, Shaman Outcasts are unable to assist in finding Ancient Tek like their peers. However, they can be employed to scavenge for cruder “Tek” which has become lost and forgotten. Dotted around the area, buried by the desert sands. More details in the Shaman sections below.
Findin’ Rod
A Shaman’s Findin’ Rod serves as a psychic extension of the self. It also serves as a physical extension of the self when fighting! Findin’ Rods usually take the form of a tall staff covered with cryptic decorations whose meaning is only known to the bearer.
| Range |
Hit Modifier |
Strength |
Save Mod |
D |
Ammo Roll |
Notes |
|---|---|---|---|---|---|---|
| - |
- |
AU +1 |
Var |
1 |
N/A |
Double-handed, Block |
Double-handed: A Shaman needs two hands (or equivalent) to use a Findin’ Rod in Hand-to-Hand Combat. If they don’t have two functional hands they cannot use this weapon and equally if they’re using this weapon they cannot use any other weapons at the same time.
Block: Much like a shield the Shaman can choose to force their opponent to reroll their highest Attack dice in Hand-to-Hand Combat. As with the shield this cancels out if their opponent has a similar parry ability.
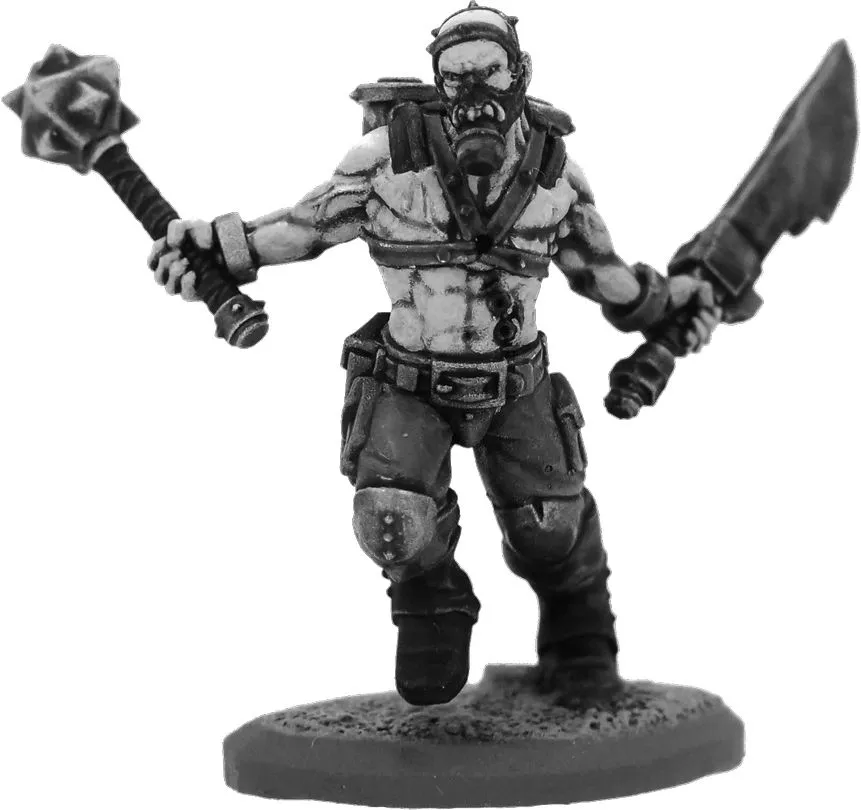
Digga Outcast Experience
Diggas start with the following experience levels:
| Type of Warrior |
Starting Experience Points |
|---|---|
| Digga-Yoofs |
0 |
| Digga-Boyz |
20 + D6 |
| Digga-Shaman |
20 + D6 |
The maximum statline attainable by a Digga is as follows:
| M |
WS |
BS |
S |
T |
W |
I |
A |
Ld |
|
|---|---|---|---|---|---|---|---|---|---|
| Diggas |
4 |
6 |
6 |
4 |
4 |
3 |
6 |
3 |
9 |
Diggas use the standard experience thresholds and Advance Table and have access to the following skills:
| Digga Outcasts |
||||||
|---|---|---|---|---|---|---|
| Muscle |
Ferocity |
Driving |
Cunnin’ |
Dakka |
Odd |
|
| Digga Shaman |
✘ |
✘ |
✔ |
✔ |
✔ |
✔ |
| Digga-Boyz |
✘ |
✔ |
✘ |
✔ |
✔ |
✘ |
| Digga-Yoofs |
✘ |
✔ |
✘ |
✔ |
✘ |
✘ |
Shaman Outcast Abilities
A Shamans who gets a Know-wot result on their Advance Table may instead choose to roll on the Shaman Abilities Table. Note - no other Warrior type may ever roll on the Shaman Abilities Table!
| D6 |
Mind Power |
|---|---|
| 1 |
Troofsayer With a wry grin and some barely-coherent advice the Shaman helps the mob make the right choices about how to approach a fight. A mob containing a Shaman with this skill adds +1 to dice rolls for determining first turn and dice rolls for reinforcements. |
| 2 |
Scrap Master By scrying, dowsing, or just being very good at guessing, the Shaman has a nose for where to find more scrap. When a scenario calls for a randomised number of scrap counters add +1 to that roll. |
| 3 |
Searchin’ Instinctz Unable to return home to the Pyramids, the Shaman Outcast turns his powers to locating valuable scrap around the outskirts of Mektown instead. After a game if you pass a Leadership Test you may add D3 to the number of Scavengers for the purposes of finding Tek (not income). |
| 4 |
Precog The Shaman has learned to trust their gut, probably because their gut is a bit psychic, and isn’t shy about telling their comrades. Every now and again it saves someone’s life! +1 Leadership for Drivers’ Swerve attempts when the Shaman is onboard a friendly Vehicle. +1 to Initiative tests when avoiding getting Squashed On Foot to Warriors within 6” of the Shaman (including the Shaman). |
| 5 |
Duck The Shaman moves in an aggravatingly mystic way. I’m sure the way attacks seem to often miss them is purely coincidental… Shooting targeting the Shaman has an extra -1 to hit modifier. Similarly Warriors that charge into Hand-to-Hand Combat with this Shaman do not receive their +1 modifier for Charging. |
| 6 |
Pinpoint Accuracy The Shaman is possessed of an uncanny deftness, making shots with a reaction speed that catches the uninitiated off guard. The Shaman does not suffer the -1 modifier for shooting at fast moving targets (Vehicles that moved more than 6”, Warriors on foot that moved more than 10”). They can also ignore the -1 modifier when shooting at appearing/disappearing targets on Overwatch. |
Digga Outcast Income
Ceremony of Searching
If your Mob includes a Shaman Outcast and they didn’t go Out of Action in the previous game you may have them perform a ceremony of searching after each battle. They commune with the spirits around them or otherwise get up to some psychic fidgy widginess in order to locate some riches for the mob. If they can pass a Leadership Test the mob gains 2D6 teef to income. This is separate from mining and not subject to Cave-In rules.
Scavenging for Tek
If the Mob includes a Shaman Outcast, instead of performing the Ceremony of Searching, you may instead scavenge for Tek. You may nominate a number of Warriors, who instead of Mining may go with the Shaman Outcast, to form a Scavenging Party. The larger the Scavenging party the greater the chance of finding the good stuff. A party size of 3 or less will never find Tek, even with the assistance of a Shaman.
Choose how many Diggas are going to search and consult the Search Table below to see the D6 value needed to find an item. All types of Diggas may search, assuming they didn’t go Out of Action during the last game. One search is conducted - you can’t split the search parties to find more than one item!
Search Table
| No. of Searchers |
1-3 |
4-5 |
6-8 |
9-11 |
12+ |
|---|---|---|---|---|---|
| D6 |
No Chance |
6 |
5+ |
4+ |
3+ |
If your searchers found something roll a further D6 to see what was found:
| D6 |
Tek Type Table |
|---|---|
| 1-2 |
Hand-to-Hand Weapons |
| 3-4 |
Gunz |
| 5 |
Armour & Stikkbombs |
| 6 |
Gubbinz |
Now roll a D6 and consult the relevant column to see what they found in the wastes:
| D6 |
Hand-to-Hand Weapons |
Gunz |
Armour & Stikkbombs |
Gubbinz |
|---|---|---|---|---|
| 1 |
Chain or Flail |
Bow |
Shield |
Boarding Plank |
| 2 |
Spear |
Crossbow |
Studded Armour |
Extra Armour Plates |
| 3 |
Club or Choppa |
Blunderbuss |
Flak Armour |
Loads Ammo |
| 4 |
‘Uge Club or Choppa |
Shoota |
Frag |
Spikes |
| 5 |
Slugga |
Kannon |
Krak |
Reinforced Ram |
| 6 |
Six-Shoota |
Linked Shoota |
‘Eavy Armour |
Big Grabber |
Diggas and Serious Injuries
Diggas that receive Serious Injuries cannot expect their Ork masters to pay for them to visit a “Medikal Profeshunal”. As a result Digga Outcasts may not visit the Dok to cure Serious Injuries.
Digga Outcasts as Captives
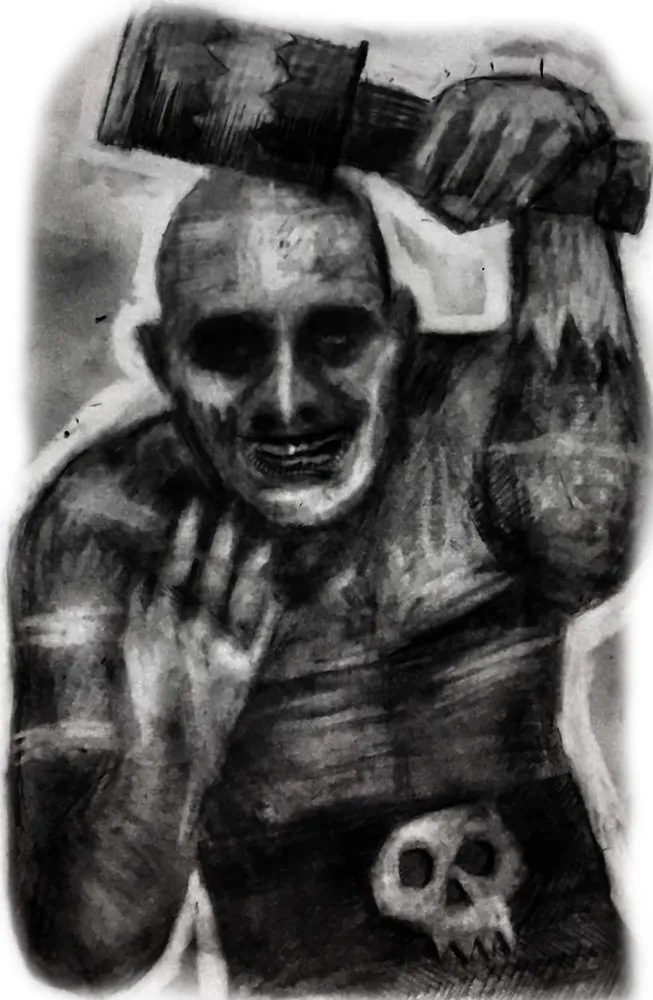
The amount an Ork Mob cares about its Digga members is variable to say the least. Some Diggas are amusing mascots and their capture is seen as a personal slight whereas others are effectively cannon fodder (“Dey got Wiggly, boss.” “Never ‘eard of ‘em.”). It’s up to the Mob’s owner whether to bother rescuing captured Digga Outcasts.
Diggas and Leadership Disputes
Diggas will never challenge for leadership of the mob. They may challenge for Driver and Gunner positions.
Armoury Appendix
Each weapon that can be Kustomised by the Meks has it listed in their Notes section, along with any restrictions on which Kustom jobs can be performed.
Notes
- Weapons that use the user’s Strength characteristic will note this “AU” (“As User”).
- Sustained Fire Dice – Weapons with these will have how many listed as “SFD” (e.g. “1 SFD”).
- Kustomisation options will be listed with the prefix “K” (e.g. “K: All”)
Hand-to-Hand
Knives and Knuckles
All Warriors carry at least a knife or a set of knuckledusters.
| Range |
Hit Modifier |
Strength |
Save Mod |
D |
Ammo Roll |
Notes |
|---|---|---|---|---|---|---|
| - |
- |
AU |
Var |
1 |
N/A |
N/A |
Chain
It’s a big length of chain. Whack someone with it and they’re not going to be happy about it. Try to show off too much and you’ll just end up hitting yourself in the back of the head.
| Range |
Hit Modifier |
Strength |
Save Mod |
D |
Ammo Roll |
Notes |
|---|---|---|---|---|---|---|
| - |
- |
AU +1 |
Var |
1 |
N/A |
Opponent may not block. Fumbles count double. |
Opponent May Not Block: Warriors armed with a Chain cannot be forced to reroll a blocked Attack (e.g. using a Shield).
Fumbles Count Double: Fumbles rolled by a Warrior armed with a Chain count as +2 to their opponent’s score, rather than the usual +1.
Club/Choppa
Solid, dependable, vicious. Additional spikey bits optional but encouraged. Whilst a club is any pipe or hefty stick strong enough to crack skulls a choppa can refer to almost any single-handed sharp thing. Often it’s an axe, sometimes a cleaver, and other times it’s a strange hybrid of blade and club. Apply repeatedly to enemies for best results.
| Range |
Hit Modifier |
Strength |
Save Mod |
D |
Ammo Roll |
Notes |
|---|---|---|---|---|---|---|
| - |
- |
AU +1 |
Var |
1 |
N/A |
N/A |
Spear
Do you like stabbing people but hate having to get close enough to smell their BO? Have I got a weapon for you…
| Range |
Hit modifier |
Strength |
Save Mod |
D |
Ammo Roll |
Notes |
||
|---|---|---|---|---|---|---|---|---|
| Short |
Long |
Short |
Long |
|||||
| - |
- |
- |
- |
AU |
Var |
1 |
- |
HtH: +1 Initiative |
| 0” - 8” |
- |
-1 |
- |
AU |
0 |
1 |
4 |
Ranged: 1 Use Only |
+1 Initiative for Hand-to-Hand Combat Draws: In the event of a draw in Hand-to-Hand Combat where Initiative values are compared to decide the winner a Warrior with a Spear counts as having +1 Initiative (over and above their potential maximum statline). This does not stack if the Warrior carries additional spears!
Single-Use Throw: A Warrior with a Spear can choose to throw it in their Shooting Phase, with the ranged profile. The Spear cannot be retrieved during the game but the Warrior will have done so by the next battle.
'Uge Club/Choppa
You know what’s better than a choppa you can hold in your hand? A choppa so big you need two hands!
| Range |
Hit Modifier |
Strength |
Save Mod |
D |
Ammo Roll |
Notes |
|---|---|---|---|---|---|---|
| - |
- |
AU +2 |
Var |
1 |
N/A |
Double-handed, Opponent wins draws. |
Double-handed: A Warrior needs two hands (or equivalent) to use an ‘Uge Club/Choppa in Hand-to-Hand Combat. If they don’t have two functional hands (e.g. due to Bionik replacement) they cannot use this weapon and equally if they’re using this weapon they cannot use any other weapons at the same time. If an arm wound or similar means that the Warrior has two different Strength characteristics, use the higher of the two.
Opponent Wins Draws: In the event of a draw in Hand-to-Hand Combat where Initiative values are compared to decide the winner a Warrior with an ‘Uge Choppa/Club loses, regardless of whether they have higher Initiative than their opponent.
Six-Shoota
A revolver-style weapon that’ll fire as fast as you can fan the hammer.
| Range |
Hit modifier |
Strength |
Save Mod |
D |
Ammo Roll |
Notes |
||
|---|---|---|---|---|---|---|---|---|
| Short |
Long |
Short |
Long |
|||||
| 0” - 6” |
6” - 12” |
+1 |
- |
3 |
0 |
1 |
4+ |
1 SFD, 1 shooting phase to reload |
Reloading: Each time a Six-Shoota is fired a shooting phase must be spent reloading it (if the Warrior wishes to fire again during the battle). Only one Six-Shoota may be reloaded per shooting phase (i.e. a Warrior with two could fire in two consecutive turns but would need to spend two shooting phases reloading in order to use both pistols again). A Six-Shoota that has yet to be reloaded is functionally identical to a Six-Shoota that has failed its Ammo Roll - it cannot be used in Hand to Hand Combat until it is reloaded. Using a Six-Shoota in Hand to Hand Combat does not deplete its ammo.
Slugga
A magazine-fed pistol of dubious efficacy. Loud, plodding, and very Orky.
| Range |
Hit modifier |
Strength |
Save Mod |
D |
Ammo Roll |
Notes |
||
|---|---|---|---|---|---|---|---|---|
| Short |
Long |
Short |
Long |
|||||
| 0” - 6” |
6” - 12” |
+1 |
- |
3 |
0 |
1 |
4+ |
N/A |
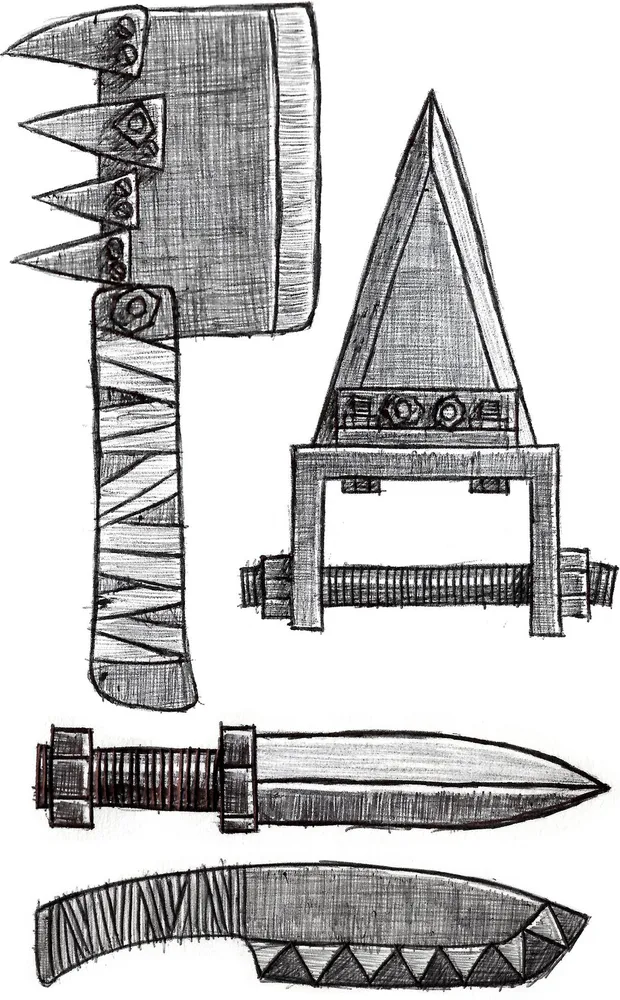
Ork Gunz
Each weapon has a note concerning whether they can be Kustomised or not. See the Da Mekboy’z Workshop section for the relevant rules.
All Ork Gunz require two hands to use.
Blunderbuss
The one advantage of a weapon with range this lousy is that it’s nearly impossible to miss. Whether the thing you hit will actually take much in the way of damage remains to be seen though as the scatter shot fired is turned away by as little as normal clothing.
| Range |
Hit modifier |
Strength |
Save Mod |
D |
Ammo Roll |
Notes |
||
|---|---|---|---|---|---|---|---|---|
| Short |
Long |
Short |
Long |
|||||
| 0” - 6” |
- |
+3 |
- |
3 |
+1 |
1 |
4+ |
K: More Dakka only |
+1 Save Modifier: Warriors hit by this weapon receive +1 to their Armour Save, including if they aren’t wearing any armour (i.e. they receive a 6+ save).
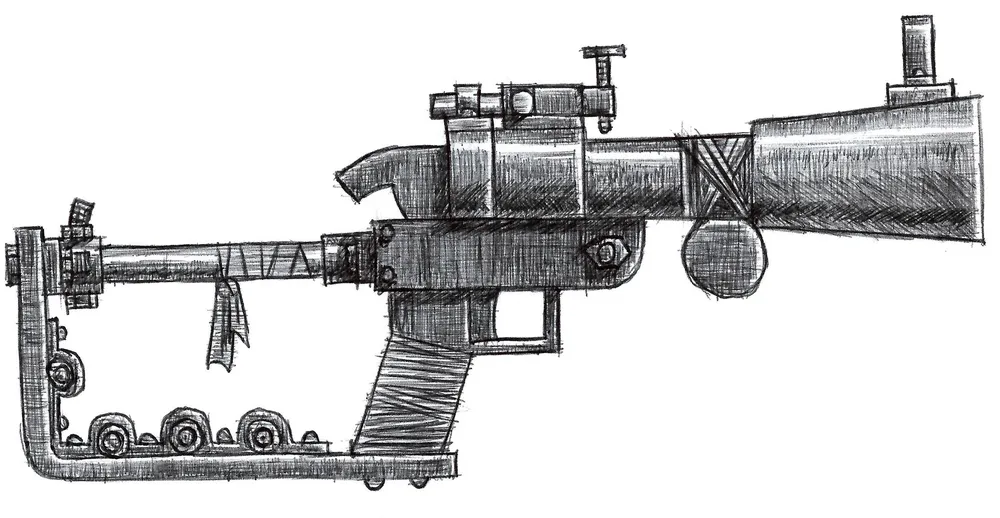
Bow
Don’t trust one of your lads with a shoota? Give ‘em a bow to prove themselves with - the old ways are sometimes best!
| Range |
Hit modifier |
Strength |
Save Mod |
D |
Ammo Roll |
Notes |
||
|---|---|---|---|---|---|---|---|---|
| Short |
Long |
Short |
Long |
|||||
| 0” - 12” |
12” - 18” |
- |
-1 |
3 |
+1 |
1 |
4+ |
K: None |
+1 Save Modifier: Warriors hit by this weapon receive +1 to their Armour Save, including if they aren’t wearing any armour (i.e. they receive a 6+ save).
Crossbow
Surprisingly killy but a right faff to make ready for another shot. Still - not to be underestimated.
| Range |
Hit modifier |
Strength |
Save Mod |
D |
Ammo Roll |
Notes |
||
|---|---|---|---|---|---|---|---|---|
| Short |
Long |
Short |
Long |
|||||
| 0” - 12” |
12” - 18” |
- |
-1 |
4 |
0 |
1 |
4+ |
Move or Fire, K: None |
Move or Fire: Warriors armed with a Crossbow can either move in their movement phase or choose to fire in their shooting phase, not both. Being onboard a moving Vehicle also counts as moving for the purposes of this rule.
Linked Gun
Any of the Gunz in this section can be permanently joined together to create a Linked Gun which can then be mounted on a Vehicle that can take a Fixed Weapon (Linked Gunz are not equippable by Warriors on foot). Pay for two of the same type of Gun (no mixing!) and use the profile for that gun. Add 1 Sustained Fire Dice to the new Linked Gun’s profile. The Kustomisin’ restrictions of the original Gun still apply.
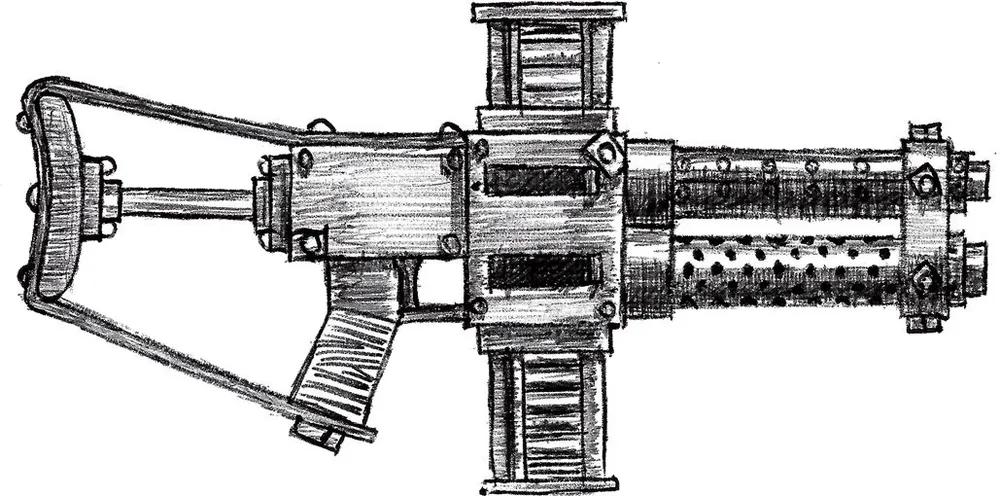
Kannon
An Orky shotgun. Kicks like a squiggoth and puts hefty holes in whatever it hits.
| Range |
Hit modifier |
Strength |
Save Mod |
D |
Ammo Roll |
Notes |
||
|---|---|---|---|---|---|---|---|---|
| Short |
Long |
Short |
Long |
|||||
| 0” - 4” |
4” - 18” |
- |
-1 |
4 |
0 |
1 |
4+ |
Knockback, K: All |
Knockback: Newton’s Third Law applies more than usual to the shells fired by an Ork Kannon - any Warrior hit (whether wounded or not) must roll under their Strength characteristic or be knocked back. If knocked back, move the Warrior 2” away from the direction of the shot. If they were Crew onboard a Vehicle at the time they will be knocked overboard (this does not apply to Drivers).
Shoota
What exactly is a shoota? There’s probably a magazine of some kind involved, definitely a barrel, and it’ll go bang when fired. Beyond that there’s rarely two shootas that look or function in the same way.
| Range |
Hit modifier |
Strength |
Save Mod |
D |
Ammo Roll |
Notes |
||
|---|---|---|---|---|---|---|---|---|
| Short |
Long |
Short |
Long |
|||||
| 0” - 12” |
12” - 18” |
+1 |
- |
3 |
0 |
1 |
4+ |
K: All |
Stikkbombz
As the name suggests these are bombs, on-a-stick. Some fling shrapnel over a large area while others concentrate the force into a single point. They also work rather well as clubs…
In rules terms both kinds have a Hand-to-Hand weapon profile and effectively function as clubs. They both have the following rule:
Might Explode: If both the Attacker and Defender in Hand-to-Hand Combat roll one or more sixes (each) for their Attack Dice then the Stikkbomb goes off, hitting both of them. Do not place the template if the Stikkbomb uses one as both Warriors instead absorb the blast.
In multiple combatant or Pilin’ On situations this only affects the two Warriors currently resolving combat, not anyone providing bonuses to them.
Grenade range: range is determined by the thrower’s Strength. Take the user’s Strength characteristic, multiply it by 2, and then add 2”. For example a Warrior with a Strength characteristic of 4 could throw a Stikkbomb up to 10” (4 x 2, +2”).
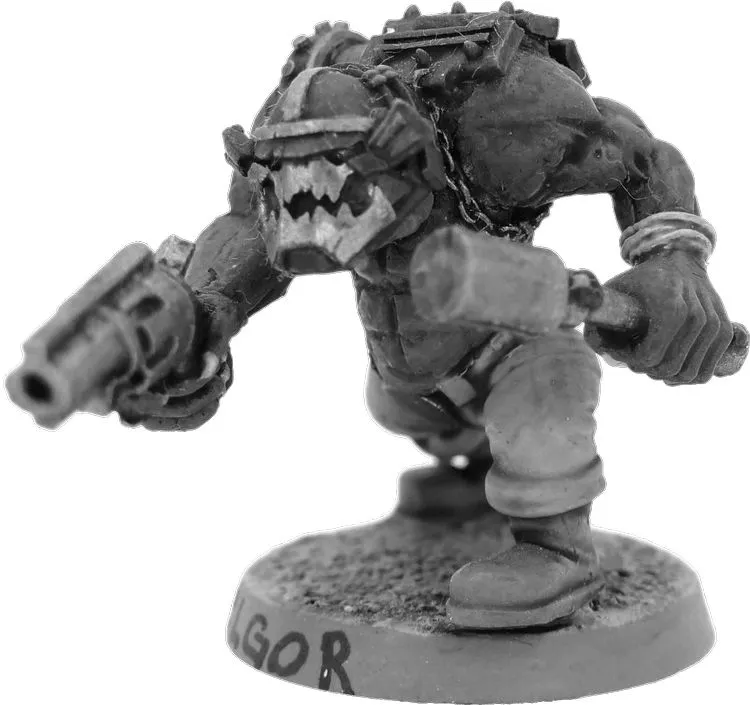
Frag
A standard fragmentation grenade - drop one into a group of enemies and watch them panic!
| Range |
Hit modifier |
Strength |
Save Mod |
D |
Ammo Roll |
Notes |
||
|---|---|---|---|---|---|---|---|---|
| Short |
Long |
Short |
Long |
|||||
| - |
- |
- |
- |
AU +1 |
Var |
1 |
- |
HtH: Might Explode |
| G |
- |
- |
- |
3 |
-1 |
1 |
Auto |
Ranged: 2” Blast Template, K: Shootier only |
Krak
These usually take the form of a shaped charge for burning a nasty hole in an armoured target, although as with all Orky tech this is merely the most common approach.
| Range |
Hit modifier |
Strength |
Save Mod |
D |
Ammo Roll |
Notes |
||
|---|---|---|---|---|---|---|---|---|
| Short |
Long |
Short |
Long |
|||||
| - |
- |
- |
- |
AU +1 |
Var |
1 |
- |
HtH: Might Explode |
| G |
- |
- |
- |
6 |
-3 |
D6 |
Auto |
K: Shootier only |
Armour
Shield
Strap a big hunk of metal to an arm and feel safer. Results may vary.
Armour Save +1 against Bows, Crossbows, template weapons, and Hand-To-Hand weapons.
Large: The shield takes one of the Warrior’s hand “slots” and so double-handed weapons cannot be used at the same time as the shield. This includes Gunz that require two hands.
Block: User may choose to force Hand-to-Hand opponent to reroll highest scoring Attack dice once per round. If their opponent has a shield (or parry ability) these cancel each other out and neither Warrior can force a re-roll.
Studded Armour
Often disparagingly known as a “t-shirt save” but the leather of studded armour has saved many a wearer’s innards from ending up as outards.
Studded Armour confers a 6+ Saving Throw.
Flak Armour
Flak Armour is a slightly fancier version of Studded Armour. Its extra layers don’t make much difference to a bullet but they can make all the difference against less high velocity sources of trouble.
Flak Armour provides a 6+ Saving Throw.
Against attacks using Blast Markers or Teardrop templates Flak Armour provides a 5+ Saving Throw. The Save Modifier of these attacks still apply (so a Frag Stikkbomb with a -1 Save Modifier would result in a 6+ saving throw for a Warrior in Flak Armour).
This 5+ save also applies to S3 hits from Vehicle hit location tables - excluding hits from falling overboard.
‘Eavy armour
The clanking a warrior wearing ‘Eavy Armour makes is usually loud enough to cover up the wheezing the extra weight tends to elicit. The loss of agility is usually worth it, admittedly as it’s proper snazzy and quite tough too.
‘Eavy Armour confers a 4+ Saving Throw.
Warriors wearing ‘Eavy Armour halve their Initiative (rounding up) when taking Initiative Tests related to Boarding Actions and avoiding being squashed.
Slaverz Stuff
The Grabba Stik and Whip are both single-handed Hand-to-Hand weapons.
Bolas and Nets are equipment, not ranged weaponry, and do not affect the User’s access to bonus Attack Dice. They are both only used in the Shooting Phase.
Grabba stik
The classic Runtherd tool - many Slaverz feel naked without theirs. Reach out and flick the switch to ensnare a would-be escapee!
| Range |
Hit Modifier |
Strength |
Save Mod |
D |
Ammo Roll |
Notes |
|---|---|---|---|---|---|---|
| - |
- |
AU |
Var |
1 |
N/A |
Captures Victim |
Captures Victim: If a weedy Warrior (Grot or human) is taken Out of Action in Hand-to-Hand Combat the Model is automatically captured. No Serious Injury roll is made.
Whip
Smarts like nothing else and very difficult to predict, whips are significantly less dangerous than a choppa strike but still valuable tools in a Slaver’s arsenal.
| Range |
Hit Modifier |
Strength |
Save Mod |
D |
Ammo Roll |
Notes |
|---|---|---|---|---|---|---|
| - |
- |
AU -1 |
Var |
1 |
N/A |
Distracts Enemy |
Strength: As user -1, not +1. That isn’t a typo!
Distracts Enemy: -1 to enemy WS in Hand-to-Hand Combat.
Bolas
Swing ‘em around your head and throw them as hard as you can! Ooft, mind your bonce!
| Range |
Hit modifier |
Strength |
Save Mod |
D |
Ammo Roll |
Notes |
||
|---|---|---|---|---|---|---|---|---|
| Short |
Long |
Short |
Long |
|||||
| 0” - 8” |
- |
- |
- |
- |
- |
- |
Auto |
Dangerous, Hobbles |
Dangerous: A roll of 1 to hit causes a S3 hit to the user. They do not damage enemies under any circumstances!
Hobbles: Warriors hit with bolas cannot move and suffers -2 WS in Hand-to-Hand Combat. They can shoot and avoid being run over as normal. Roll a 4+ in the hobbled Warrior’s recovery phase to free them. Bolas have no effect on vehicles.
Net
Bam! Net! Not lethal but a nightmare to escape in the middle of a battle.
| Range |
Hit modifier |
Strength |
Save Mod |
D |
Ammo Roll |
Notes |
||
|---|---|---|---|---|---|---|---|---|
| Short |
Long |
Short |
Long |
|||||
| 0” - 4” |
- |
- |
- |
- |
- |
- |
Auto |
One Use, Entangles |
One Use Only: Normal hit modifiers apply.
Entangles: Models hit with a net cannot move or shoot and count as Down for Hand-to-Hand Combat purposes. Roll a 6 in the entangled Warrior’s Recovery Phase to free them. Each friendly Warriors in base contact may add +1 to the roll but cannot shoot in the shooting phase if they choose to do so. Entangled Models are automatically Captured if the game ends. Nets have no effect on vehicles.
Big Gunz
‘Eavy Shoota
Imagine a shoota. Now imagine it’s twice the size. Oh and make the bullets bigger too - and more of them while you’re at it!
‘Eavy Shootas (sometimes known as Big Shootas) are just that - large calibre machine guns that blow rows of nasty holes in whatever they’re pointed at.
| Range |
Hit modifier |
Strength |
Save Mod |
D |
Ammo Roll |
Notes |
||
|---|---|---|---|---|---|---|---|---|
| Short |
Long |
Short |
Long |
|||||
| 0” - 20” |
20” - 40” |
- |
-2 |
5 |
-2 |
1 |
4+ |
2 SFD, K: All |
Harpoon Gun
Tharr she blows! There’s something tremendously nautical about a harpoon gun. A huge metal arrow fired at high speed will ruin vehicles and warriors’ days alike. Getting a solid hit can be tricky though, particularly at long range.
| Range |
Hit modifier |
Strength |
Save Mod |
D |
Ammo Roll |
Notes |
||
|---|---|---|---|---|---|---|---|---|
| Short |
Long |
Short |
Long |
|||||
| 0” - 12” |
12” - 18” |
- |
-1 |
D6 +2 |
-2 |
D3 |
4+ |
K: All |
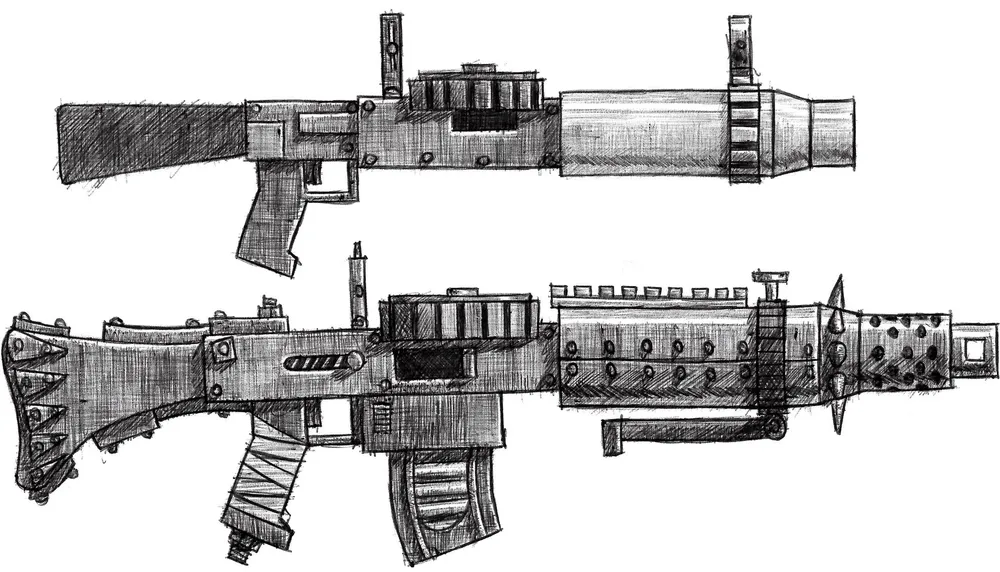
Strength: roll D6 + 2 for each shot this weapon makes to determine that shot’s Strength characteristic (S3 – S8).
Linked Gun
See the Linked Gun profile from the Gunz section of this appendix.
Skorcha
They drip, they sputter, and they sometimes explode. Their gunners have a love/hate relationship with them. When they go off though - ooft, it gets nasty.
| Range |
Hit modifier |
Strength |
Save Mod |
D |
Ammo Roll |
Notes |
||
|---|---|---|---|---|---|---|---|---|
| Short |
Long |
Short |
Long |
|||||
| T |
T |
- |
- |
4 |
-2 |
1 |
4+ |
Ammo Test, Catching Fire, Template, K: Special |
Ammo Test: An Ammo Roll must be made after every shot fired.
Catching Fire: Warriors and Vehicles can both be set fire to using a Skorcha. Roll a D6 for each hit made by a Skorcha - on a 4+ the target catches fire! Note - hit, not wounded; this is in addition to wounding. Warriors on foot that go Down or Out of Action do not catch light but otherwise they are now on fire - see the Movement section of the GCE Core Rules for how that works. Similarly the rules for Vehicles Catching Fire can be found in the Vehicle Shooting section of the GCE Core Rules.
Template: Skorchas use the standard “Flamer” teardrop template. See the GCE Core Rules for how template weapons work.
Kustomisin’ Special: Shootier or Longer Range only. Any subsequent upgrade will reduce the effect of the other option. Range changes are done using the three teardrop template sizes - Hand Flamer Template, Flamer Template, Heavy Flamer Template (4”, 8”, and 16” long respectively).
For example, two Shootier upgrades would reduce range down to a Hand Flamer Template.
Spear gun
Firing a volley of spears at something is generally a good idea, or so the thinking goes. Rack ‘em up!
| Range |
Hit modifier |
Strength |
Save Mod |
D |
Ammo Roll |
Notes |
||
|---|---|---|---|---|---|---|---|---|
| Short |
Long |
Short |
Long |
|||||
| 0” - 12” |
12” - 18” |
+1 |
- |
4 |
-1 |
1 |
4+ |
2 SFD, K: All |
Rokkit launcher
The bane of anything armoured, Ork Rokkit Launchers are accurately described as “Ded Killy”. Most Gunners don’t know what words like “shaped charge” mean but that makes little difference to their efficacy.
| Range |
Hit modifier |
Strength |
Save Mod |
D |
Ammo Roll |
Notes |
||
|---|---|---|---|---|---|---|---|---|
| Short |
Long |
Short |
Long |
|||||
| 0” - 12” |
12” - 30” |
- |
-1 |
6 |
-3 |
D6 |
6+ |
K: All |
Gubbinz
Some Gubbinz have the stipulation that they can only be mounted in certain places. The sides are the usual vehicle quadrants, as seen in this diagram. These are not “slots” - mounting something on the left side does not mean another piece of Gubbinz can’t be mounted on the Vehicle’s left side. Between games you may move Gubbinz between quadrants, assuming where you’re moving them to is a legal location as described in their rules. No sneakily tryi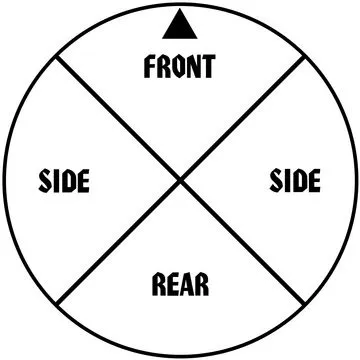
ng to move things to places they weren’t intended!
If the Gubbinz Damage Location is hit during a battle, randomise which single item of Gubbinz takes the damage. Unless otherwise stated a Penetrating Hit on an item of Gubbinz renders it unusable on a 4+. It will be repaired before the next battle.
Boarding Plank
Why leap when you can stroll? Ork boarding planks are usually spiky affairs that securely attach to their prey once deployed. Tearing them loose is advisable but it’ll hurt!
If a Vehicle declares that it is Racing or Chasing an enemy Vehicle it may deploy a Boarding Plank. No operator is needed for this - it deploys automatically. Once this is done the Enemy Vehicle will suffer 1 point of damage if it moves more than 2” from the Racing/Chasing Vehicle for any reason.
A deployed Boarding Plank may be used by Warriors on either Vehicle to cross between them without taking an Initiative Test.
Big Ork Vehicles have three places where a Boarding Plank may be fitted - front, left side, and right side. You may fit one at each location if you wish!
Small Ork Vehicles may not mount a Boarding Plank.
Extra Armour Plates
You know what’s better than armour? Lots of armour!
The Extra Armour gubbinz provide a Saving Throw, much like Armour on a Warrior. Each purchase of Extra Armour Plates for a Vehicle ups the Saving Throw by +1 (starting at 6+) to a maximum of 4+. When the Vehicle’s Armour is penetrated (any location), a successful Extra Armour Plates save will negate the hit completely. This saving throw is affected by the hit’s Save Modifier.
If Extra Armour Plates are damaged by a 4+ hit to the Gubbinz location then 3 Extra Armour Plates are unusable for the rest of the game.
Big Vehicles may have up to 6 Extra Armour Plates – meaning a fully stocked Vehicle of this type can lose 3 and still have a backup 3 to provide a save!
Small Vehicles may have up to 3 Extra Armour Plates.
Big Grabber
Getting close to an enemy vehicle is pretty dangerous - why not make it more dangerous for them? A big hydraulic claw can liven things up - both for the enemy vehicle and its crew!
Once installed a member of the Mob’s Crew can choose to operate it during your turn. Unlike Driver/Gunner positions this is not a permanent assignment and can vary throughout the battle. A Warrior operating a Big Grabber may not fight in Hand-to-Hand Combat in the same player turn they make an attack with it, but they may shoot. Enemies may not operate your Big Grabber.
When the Vehicle comes within range to perform a Ram, Rake, or Sideswipe on an enemy Vehicle the Big Grabber can be used. The Vehicle does not need to actually perform a Ram/Rake/Sideswipe, although it may if you wish. The Big Grabber attack is resolved before that can happen and the enemy Vehicle may not Swerve to avoid it!
A Big Grabber attack automatically hits and penetrates one random Damage Location. Roll 2D6 and pick the highest of the two dice as the Damage result.
If you hit the Driver or Crew location you grab someone in addition to any other damage! The Crew member should be randomised as normal. You can choose to drop them during your turn, whereupon they take a S3 hit and land D3” away from your Vehicle. If they’re still grabbed at the end of the game they are automatically Captured. Any penetrating hit affecting the Big Grabber causes the grabbed Warrior to be dropped, regardless of other damage.
Big Ork Vehicles may fit one Big Grabber - pick any of the quadrants described above.
Small Ork Vehicles may not mount a Big Grabber.
Reinforced Ram
Ramming is dangerous at the best of times - what if a vehicle was modified to be even rammier? Wouldn’t that be great? Too right.
When a Vehicle with a Reinforced Ram performs a Ram (or is involved in a head-on Ram) one of the Damage Rolls should be done using 2D6. Pick the highest Damage result.
Sideswiping and Raking aren’t affected by having a Reinforced Ram.
Big Ork Vehicles may fit one Reinforced Ram - fitted to the front quadrant of the Vehicle.
Small Ork Vehicles may not mount a Reinforced Ram.
Spikes
A vehicle covered in spikes looks properly menacing and that’s the usual reason Orks add them. The fact that it’s even more unpleasant for targets on foot is merely a bonus!
Any time a Warrior is hit by the vehicle (friend or foe) and the effect would be a Strength 3 Hit it instead becomes a Strength 4 hit. This includes squashing Warriors on foot, failed Boarding attempts, and falling off in general. It also affects incoming penetrating hits on the Vehicle (shooting/ramming/etc..). All of these are made worse by a spiky vehicle!
Both Big Ork Vehicles and Small Ork Vehicles can have Spikes.
Extra Spikes
There’s clearly still some room onboard for spikes. Look - that bit over there could clearly benefit from a rusty barb the size of your forearm!
Extra Spikes require Spikes to be fitted first and effectively replace them. In addition to the benefits of Spikes a Vehicle with Extra Spikes also inflict a -1 modifier on Initiative Tests against enemy Warriors attempting to board it. This modifier also applies to Warriors trying to avoid being squashed by it (friend or foe!).
If rendered unusable by damage during a game Extra Spikes are downgraded to Spikes (meaning it would take two destroying hits to remove all spikiness from a Vehicle). As with all damage to Gubbinz they’ll be repaired by the next game.
Both Big Ork Vehicles and Small Ork Vehicles can have Extra Spikes.
Wrecker Ball
Did you know that wrecking balls don’t just work on buildings? It’s true. Talk to your local Mek for more information!
Once installed a member of the Mob’s Crew can choose to operate it during your turn. Unlike Driver/Gunner positions this is not a permanent assignment and can vary throughout the battle. A Warrior operating a Wrecker Ball may not fight in Hand-to-Hand Combat in the same player turn they make an attack with it, but they may shoot. Enemies may not operate your Wrecker Ball.
When the Vehicle comes within range to perform a Ram, Rake, or Sideswipe on an enemy Vehicle the Wrecker Ball can be used. The Vehicle does not need to actually perform a Ram/Rake/Sideswipe, although it may if you wish. The Wrecker Ball attack is resolved before that can happen and the enemy Vehicle may not Swerve to avoid it!
A Wrecker Ball attack automatically hits and penetrates D3 random Damage Locations.
If you hit the Driver or Crew location you knock them off the Vehicle in addition to any other damage! The Crew member should be randomised as normal. They take a S3 Hit and are knocked D3” away from their Vehicle (in whatever direction seems most appropriate!).
If a Wrecker Ball takes a Penetrating Hit then roll as normal (4+ renders it unusable) but in addition to this a 6 causes it to also hit the Vehicle it’s mounted on (D3 random Damage Locations are penetrated).
Big Ork Vehicles may fit one Wrecker Ball - pick any of the quadrants described above.
Small Ork Vehicles may not mount a Wrecker Ball.
Loadsa Ammo
Boxes of rokkits, lengthy belts of bullets, extra burny juice! It’s always good to have spare ammunition for the vehicle's fixed weapon.
A Fixed Weapon with Loadsa Ammo ignores its first failed Ammo Roll. Additional failed Ammo Rolls can be ignored by mounting more Loadsa Ammo Gubbinz.
Big Ork Vehicles may carry as many Loadsa Ammo Gubbinz as you’d like.
Small Ork Vehicles may carry a single Loadsa Ammo.
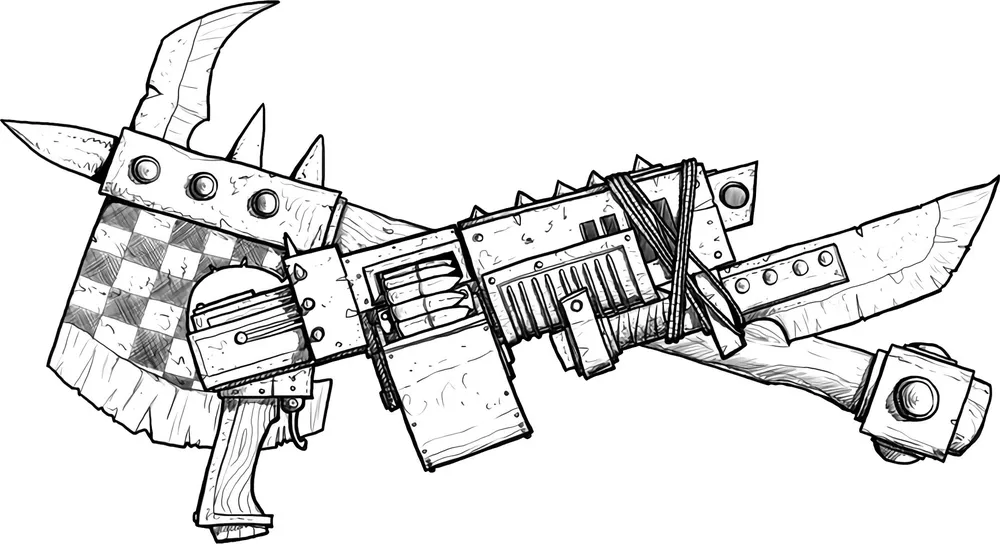
Misc Appendix
Vehicle Capacities
Vehicle capacities can be a source of confusion for some players. Vehicles can be all shapes and sizes - build whatever contraptions you like. Crew capacity is based on how many models are physically able to fit† however (depending on your models, players, and preferences) you may prefer to stipulate vehicle capacities rather than using your vehicles’ literal capacities.
Based on the models of the late 1990s Ork vehicle capacities were roughly as follows:
Transports: Driver, Gunner, 6 additional crew.
Support: Driver, Gunner, 1 additional crew.
Small: Driver, 1 additional crew
You may wish to adjust this. Discuss them with the other players in your campaign and agree what you feel is reasonable.
† Models that fall off are not deemed to have fallen off in-game!
Licence details and Credits
This document was written by Morgan Fox, Matthew Bester, Tom Inglis, Ben Middleton, Nick Williams, Andrew Meijers, Ben Saunders, and Chris Noto.
It is licenced under Creative Commons Attribution-NonCommercial-ShareAlike 4.0 International
https://creativecommons.org/licenses/by-nc-sa/4.0/
Unsure what any of that means?
Visit https://gorkamorka.co.uk/creative-commons for an explanation.
Box-out vignette was written by Ross “Depiff” Graham and is under the same licence as above.
Cover art by Andrew Meijers (Creative Commons Attribution-NonCommercial-ShareAlike 4.0 Unported license)
Additional art and images provided by: Andrew Meijers (Creative Commons Attribution-NonCommercial-ShareAlike 4.0 Unported license) Andrew Trevorrow-Seymour (Creative Commons Attribution-NonCommercial-ShareAlike 4.0 Unported license) Clayton Tait (Creative Commons Attribution-NonCommercial-ShareAlike 3.0 Unported license) Darren Sampson (Creative Commons Attribution-ShareAlike 3.0 Unported license) David Cammack (Creative Commons Attribution-ShareAlike 3.0 Unported license) David Prentice (Creative Commons Attribution-NonCommercial-ShareAlike 4.0 Unported license) Louis DePrix (Creative Commons Attribution-NonCommercial-ShareAlike 4.0 Unported license) Matthew Bester (Creative Commons Attribution-NonCommercial-ShareAlike 4.0 Unported license) Morgan Fox (Creative Commons Attribution-NonCommercial-ShareAlike 4.0 Unported license) Nicola Juno (Creative Commons Attribution-NonCommercial-ShareAlike 4.0 Unported license)
The layout was made by Morgan Fox using images created by Jenny Fox and is also licensed under a Creative Commons Attribution-NonCommercial-ShareAlike 3.0 Unported license.
GCE is in no way affiliated with Games Workshop.
Furthermore, Gorkamorka is a trade mark of Games Workshop Ltd. and is used without permission. No challenge to its status is intended.